Windows - Adjustments, Wind Noise/Water Leaks
REF. NO. 72/6, 94/1To: OUR MERCEDES-BENZ PASSENGER CAR DEALERS
DATE: January 1989
SUBJECT:
WINDOW ADJUSTMENT (SEQUENCE AND PROCEDURE)
MODEL 107
For complaints regarding wind noises, air and/or water leaks around the door windows, perform the procedure described below in the sequence presented.
Note:
On models 107.04, first adjust the windows with the soft top in place then align the hard top with the adjusted windows by adjusting the ornamental trim or shimming the rubber seal. Do NOT ADJUST THE WINDOWS To The HARD TOP.
The procedure is applicable to both manual and power windows and assumes that the door fit to the chassis is correct.
Procedure
1. Remove interior door trim panel (see Service Microfiche "Body assembly jobs I model 107" job no. 72-100).
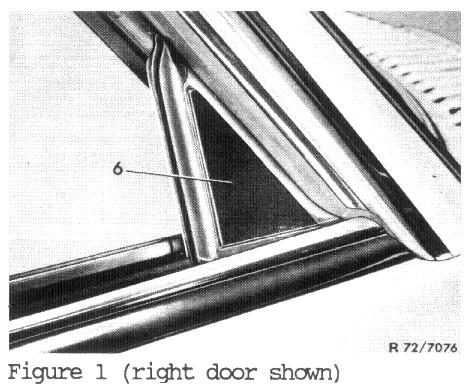
2. Adjust guide bracket (6) so that it presses against the A-pillar seal with moderate pressure when the door is closed (Figure 1).
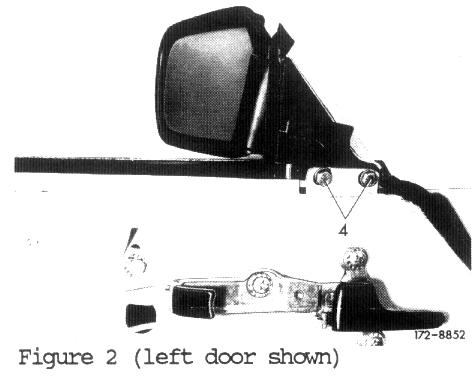
To do this, loosen two bolts (4) on guide bracket and adjust. Retighten bolts (Figure 2).
Note:
The seal must not be squeezed or pinched when the door closes.
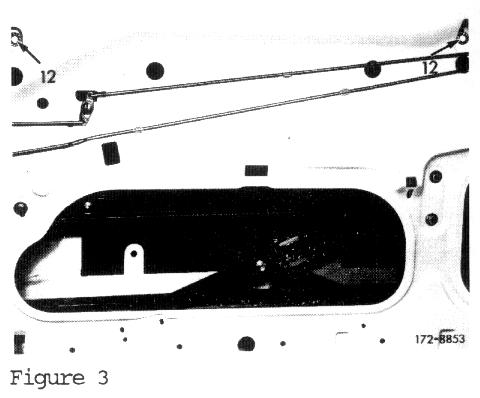
3. loosen two hex bolts (12) on upper stop plate (angle bracket) (Figure 3).
4. Raise window until the front edge of guide bracket (6, Figure 1) and front edge of window are in alignment. Tighten bolts (12, Figure 3).
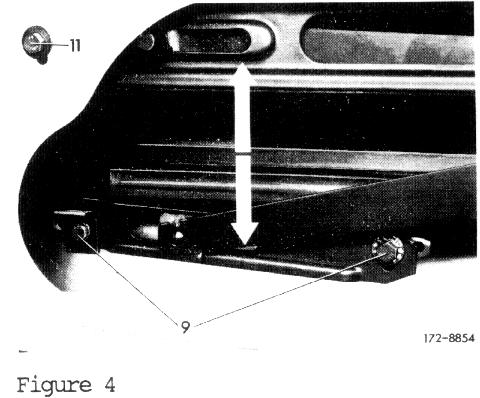
Correction can be made by loosening two bolts on rear lifting rail (9) and adjusting window. Retighten bolts (Figure 4).
Additional adjustment is possible by loosening bolt on window lifter mechanism (11) and adjusting. Retighten bolt (Figure 4).
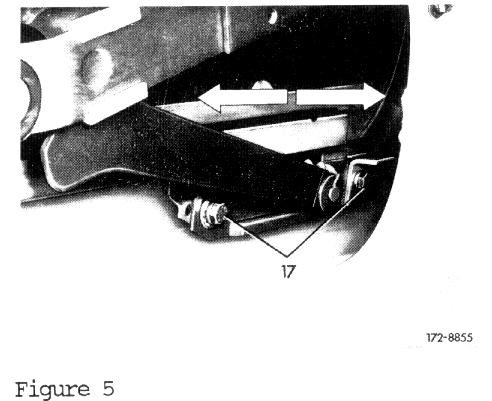
5. Adjust window at front lifting rail by loosening two bolts (17) and moving the lifting rail left or right (arrows) until window presses against A-pillar seal with moderate pressure when the door is closed. Retighten bolts (Figure 5).
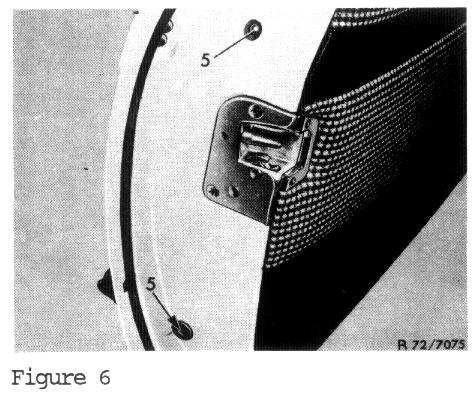
6. Remove plastic plugs and loosen both screws, (5) on rear guide rail (Figure 6).
Note:
Adjust the lateral preload of the glass using both:
-screws (5) at rear guide rail
-nuts (10) at the front guide rail
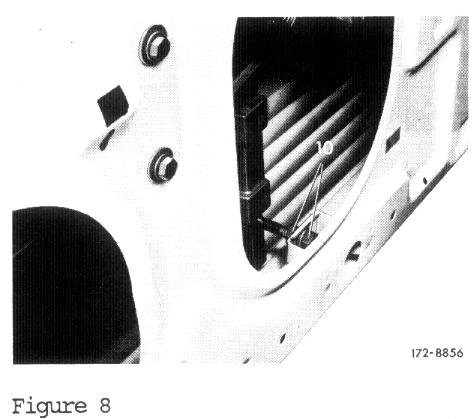
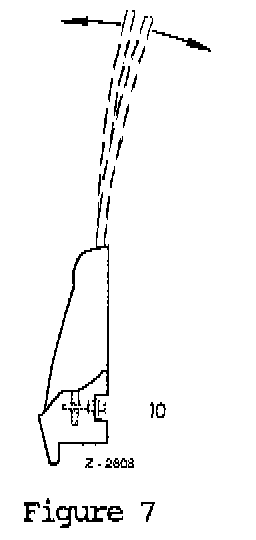
7. Loosen nuts (10) on front guide rail (Figure 8).
Note:
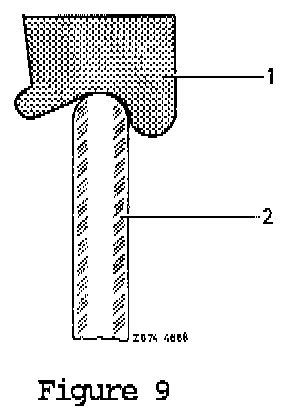
The correct preload of the window is obtained when the glass just contacts the upper front edge of the A-pillar seal, when the door lock mechanism is engaged to the first notch. When the door is completely closed, the glass (2) must contact the inner lip along the entire length of the A-pillar seal (1, Figure 9).
8. Adjust lateral preload of window at rear guide rail with screws (5, Figure 6) so that the glass edge presses against the entire vertical length of the rear seal when the door is completely closed. Retighten screws.
Note:
If necessary, a backing strip (e.g. felt) can be fastened to the rear seal of the window on the soft or hard top of models 107.04.
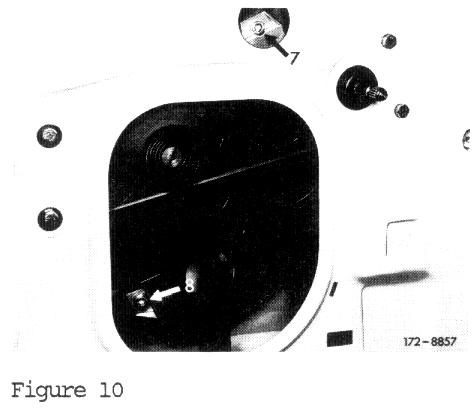
9. Adjust upper limit of window travel by loosening hex bolts (12, Figure 3) of upper stop plate (7, Figure 10). Retighten bolts.
10. Adjust lower limit of window travel with lower stop plate (8) so that upper edge of window is flush with sealing strips along the top of the door (Figure 10).
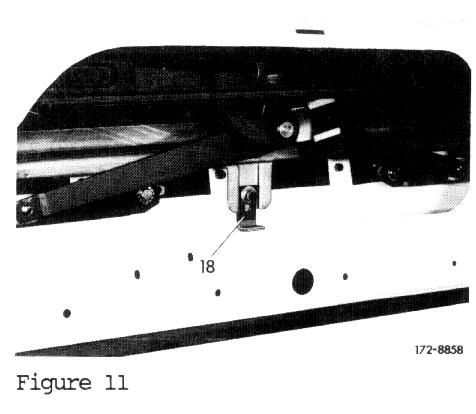
Note:
On vehicles with the first version window lifter, the lower limit of window travel must be adjusted at the external lower stop plate (18, Figure 11).
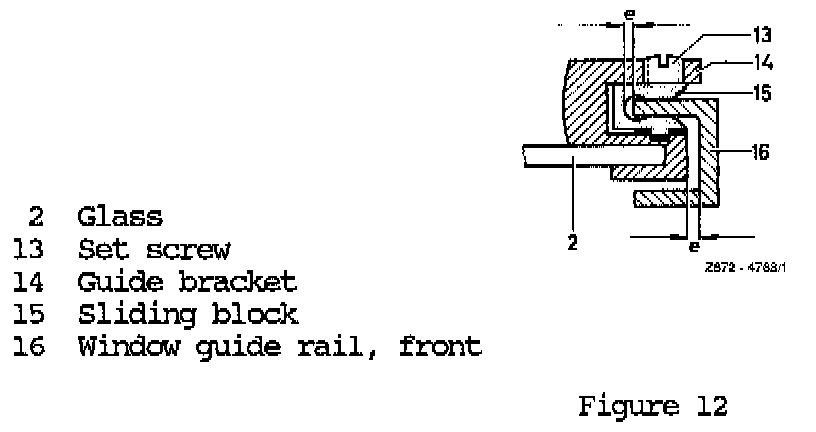
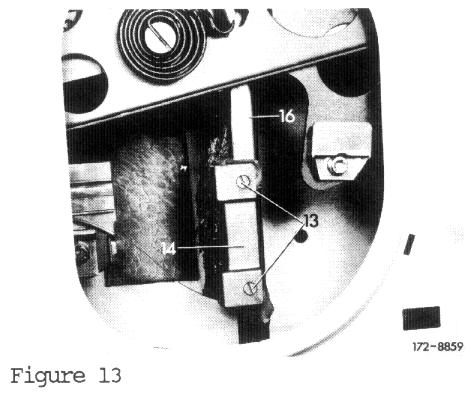
11. Adjust front sliding block (15) with set screws (13), if so equipped, so that the window can move freely without side play by turning that set screws all the way in and then backing up 3/4 turn (Figures 12 and 13).
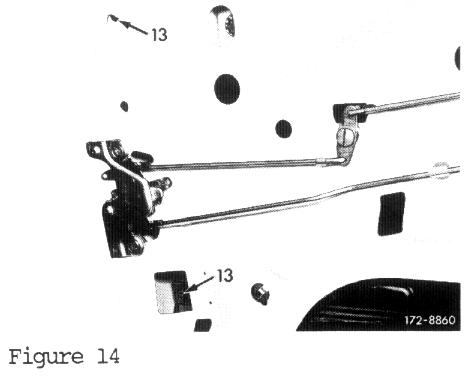
12. Adjust rear sliding block in similar fashion, except back-up set screws (13), if so equipped, one whole turn (Figure 14).
Note:
When adjusting the windows, verify that the sliding blocks are securely bonded onto the glass. Should these blocks become detached from the glass, the glass must be replaced.
13. After completing the necessary adjustments, all sliding surfaces must be lubricated with corrosion preventive grease.
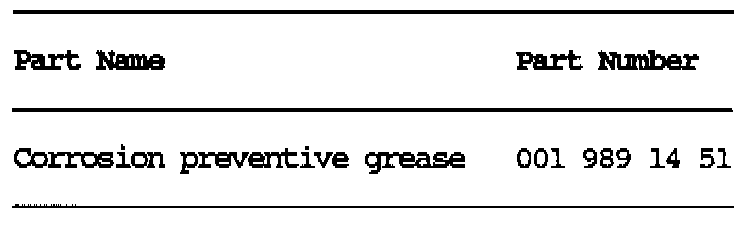
Parts Information
Time Allowance
Refer to the latest time guide microfiche, operation nos. 72-0455 to 0458