Constant Velocity Joint Boot: Service and Repair
EXCHANGING RUBBER SLEEVES ON REAR AXLE SHAFT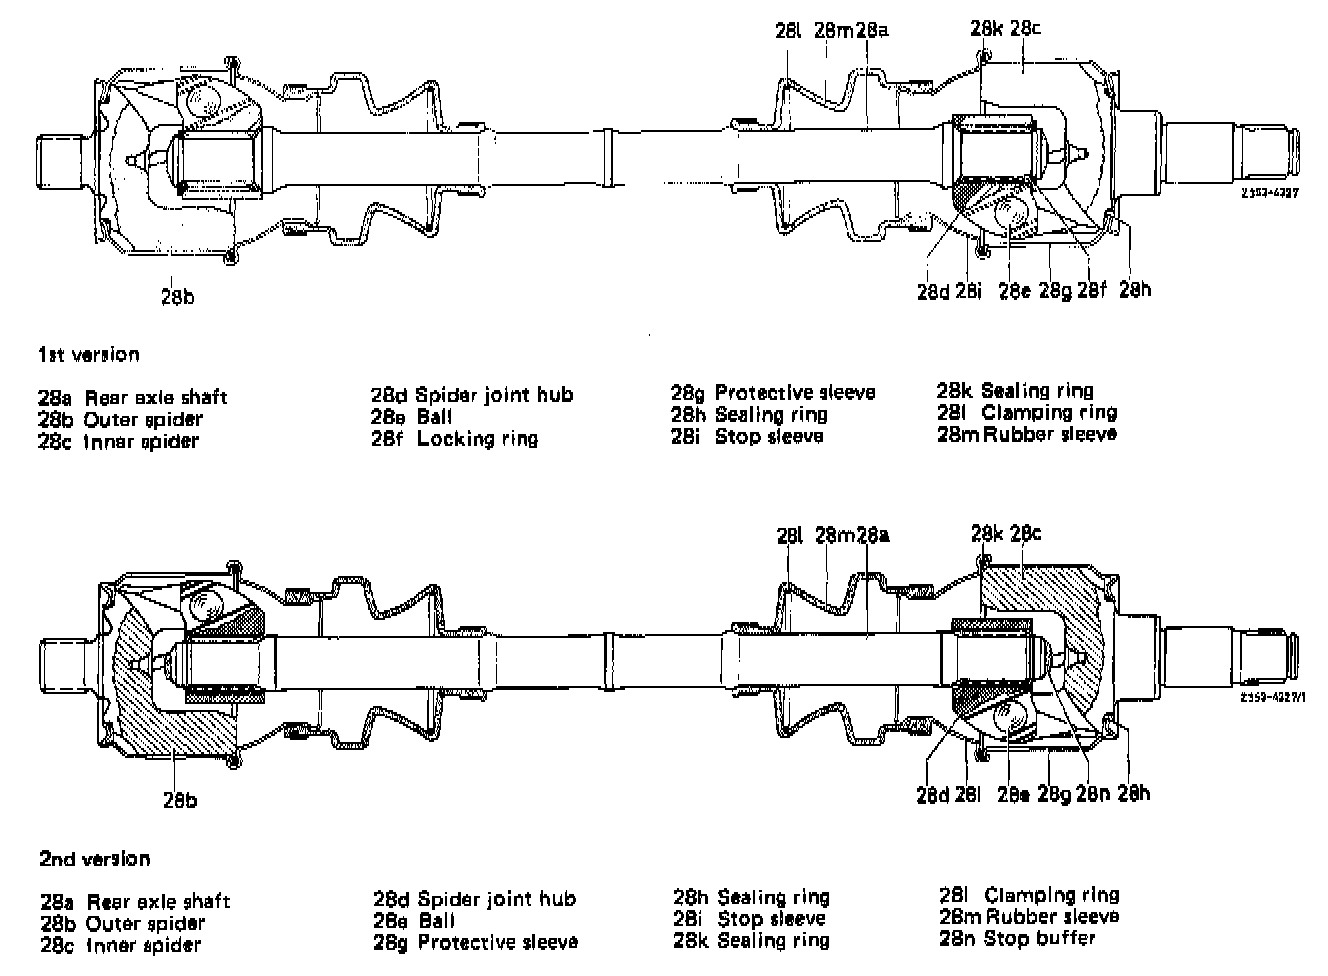
Note:
- The complete rear axle shaft can be individually removed. If the sleeves are replaced on both rear axle shafts, removal together with rear axle center piece is recommended.
- The rubber sleeve of rear axle shaft with large inner joint can be renewed only after disassembly of small joint. If the large inner joint is leaking e.g. between protective sleeve and spider or on bead between protective sleeve and stop sleeve, the complete rear axle shaft must be renewed, since no cutting and beading tool is available for the protective and stop sleeve of the large joint.
Disassembly
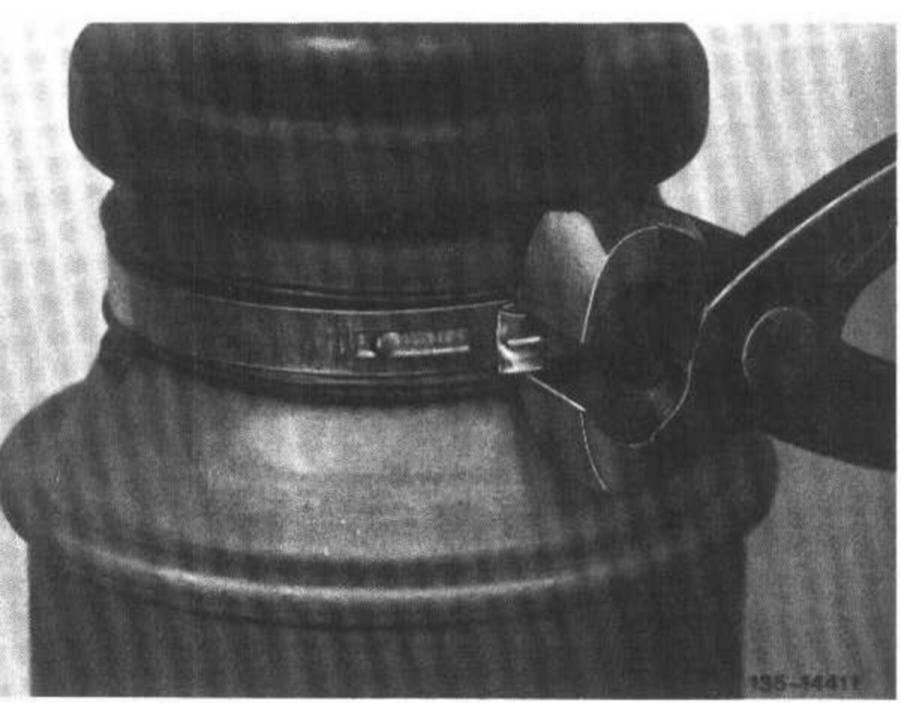
1 Loosen hose clamps and remove. Open hose clamps without clamping screw at tensioning eye by means of cutting pliers.
2 Slide back rubber sleeve and drain spider joint oil.
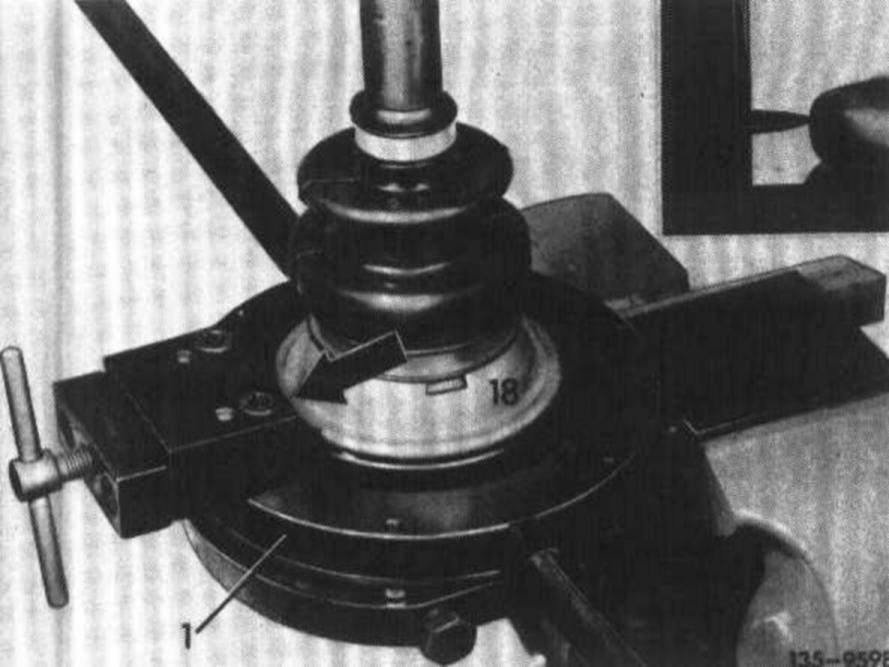
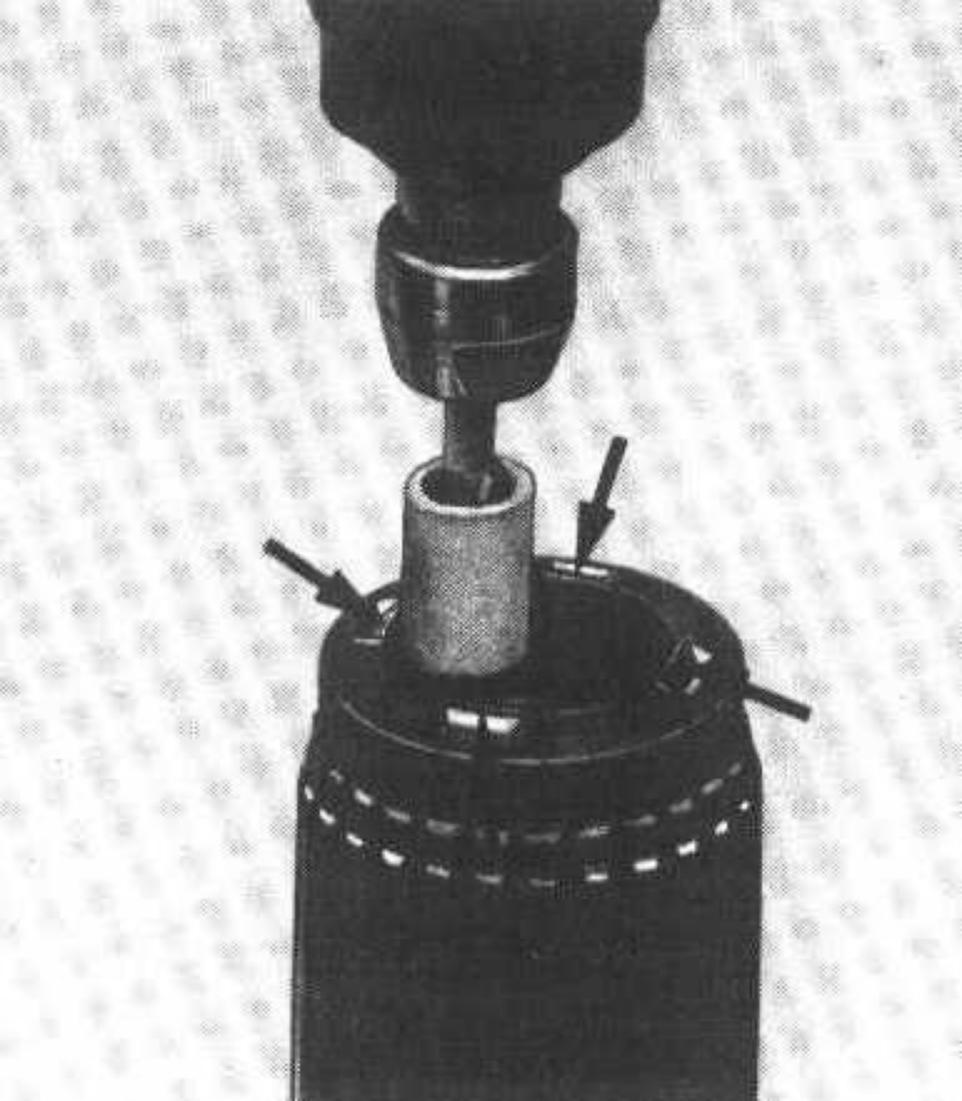
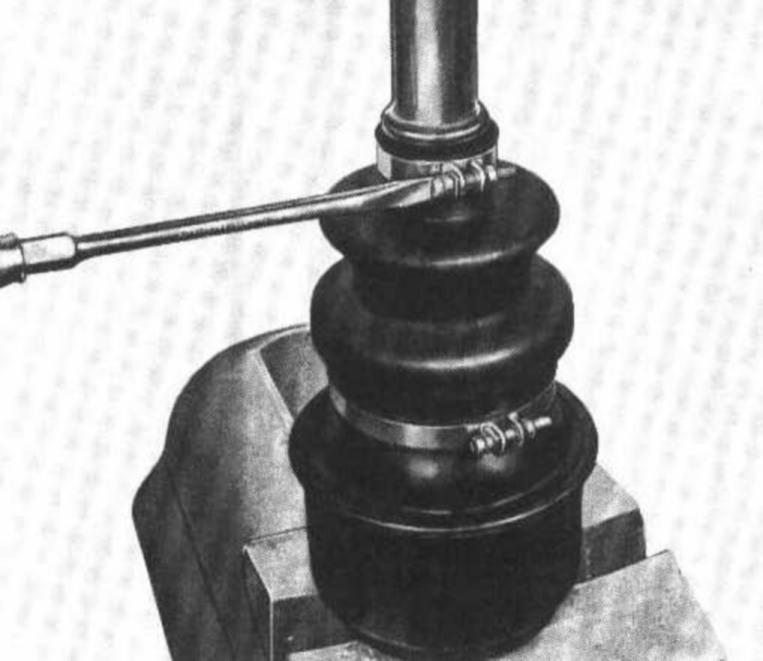
3 Open stop sleeve (18) of synchromesh joint at beaded edge by means of a cutting tool, via setting cutting wheel to center of bead and exerting slight pressure against stop sleeve (arrow).
4 Pull protective sleeve from spider and remove spider from spider joint hub together with 6 balls.
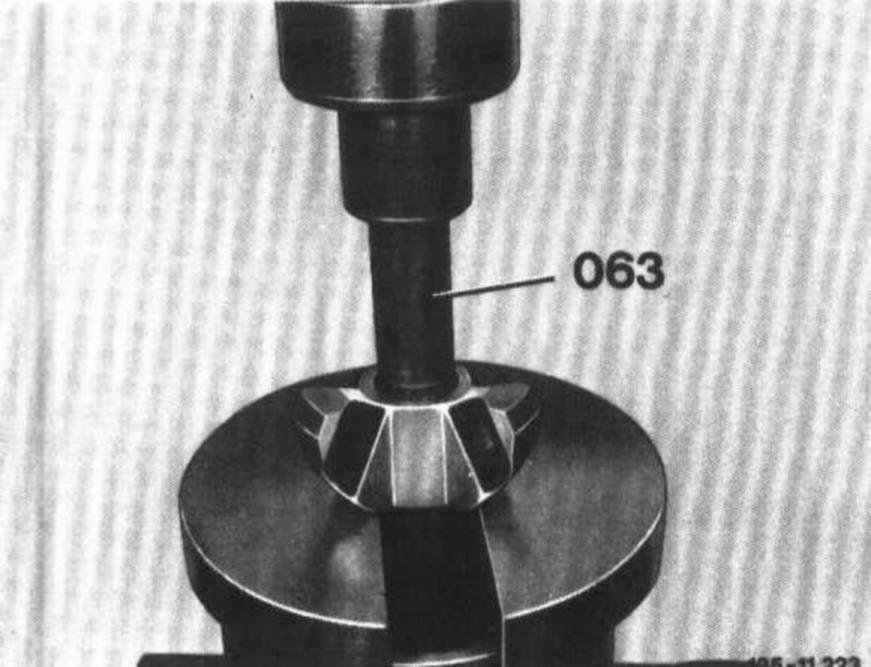
5 Remove locking ring, if installed, from groove in rear axle shaft and press spider joint hub from rear axle shaft by means of removing mandrel (063).
6 Pull stop sleeve and rubber sleeve from rear axle shaft.
Note: The second rubber sleeve can now be pulled off after loosening hose clip over disassembled end of rear axle shaft, if required. Make sure that none of the lubricant is getting lost and that no dirt is entering inside joint.
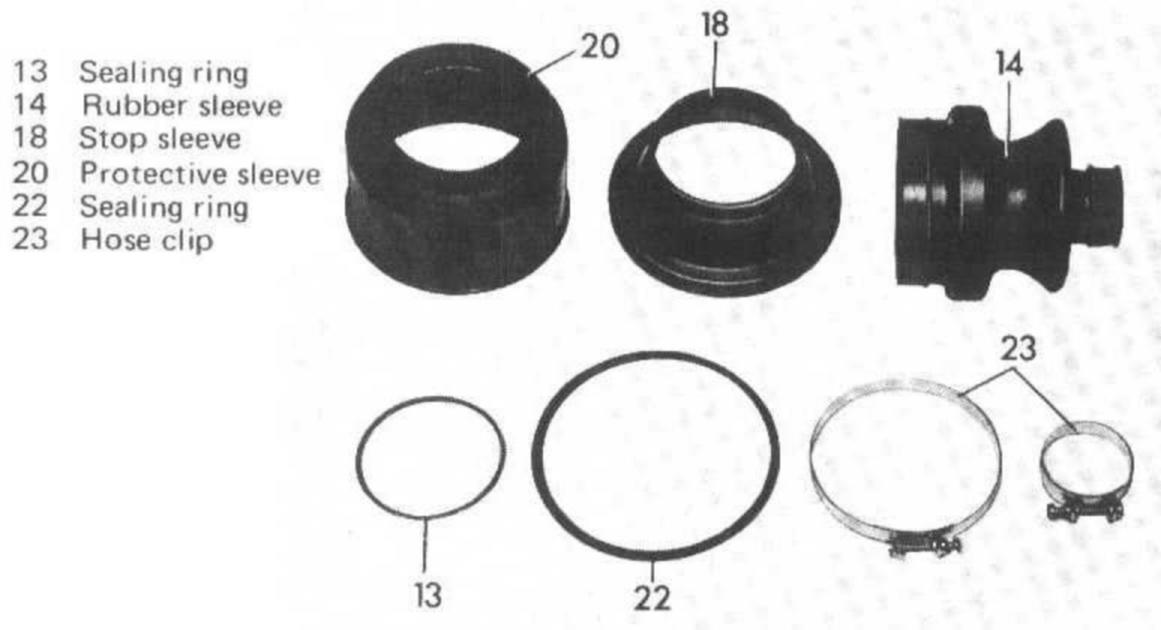
7 Carefully clean disassembled joint.

8 Check ball races of spider joint hub and spider as well as balls for wear. If these parts are badly worn, renew complete rear axle shaft.
Note: For changing sleeves, a repair kit with all required parts is available. If the same rear axle shaft requires a second sleeve, use an additional repair kit comprising a rubber sleeve and two hose clips.

9 Check stop buffer for damage. Renew badly distorted stop buffers.
10 Split stop buffers with suitable tool into two parts and then remove.
Assembly
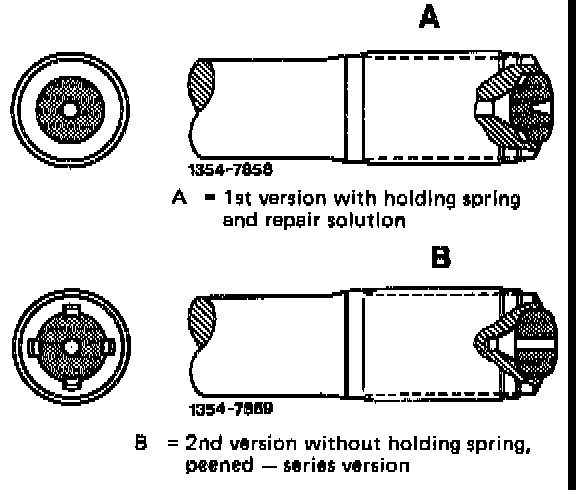
11 Push-in stop buffer with holding spring up to contact surface.
Note: Only stop buffers with holding spring (A) are available as spare parts. On rear axle shafts of 2nd version first remove dents caused by peening from inside by means of a grinder.
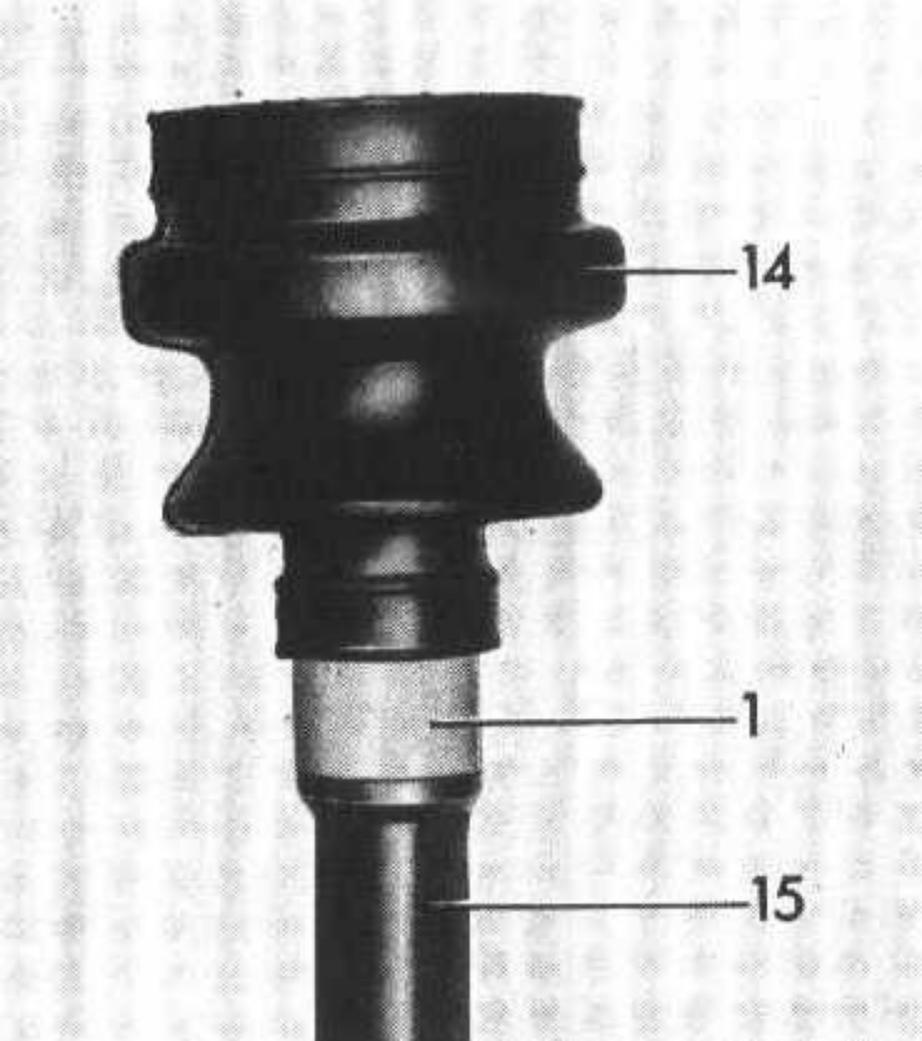
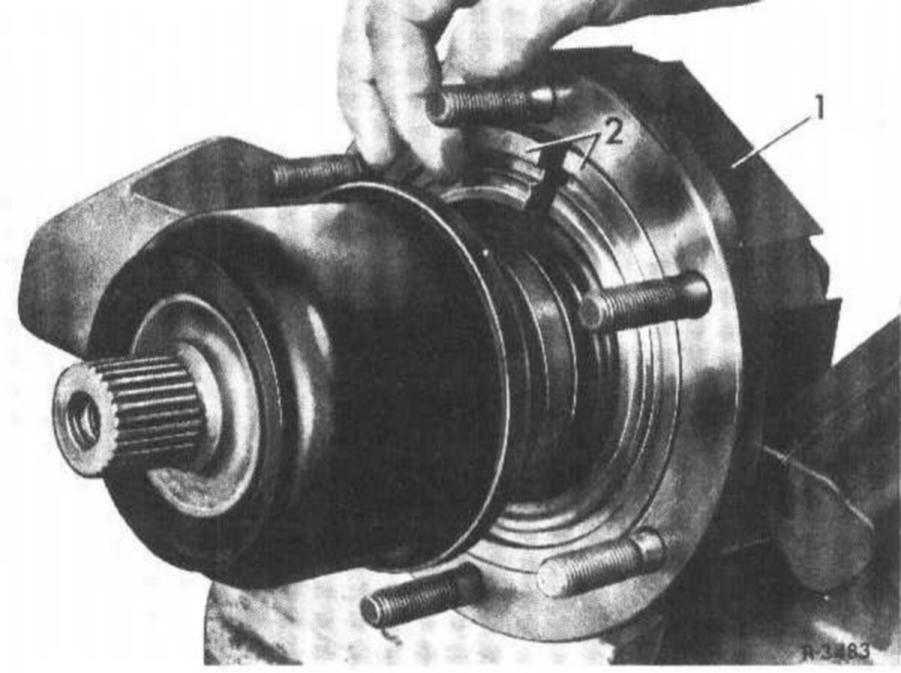
12 Place assembly sleeve (1) on splining of rear axle shaft (15).
13 Slip new rubber sleeve (14) on rear axle shaft.
14 Attach new stop sleeve over rear axle shaft.
15 Position clamping device (1) against sleeve flange of rear axle shaft.
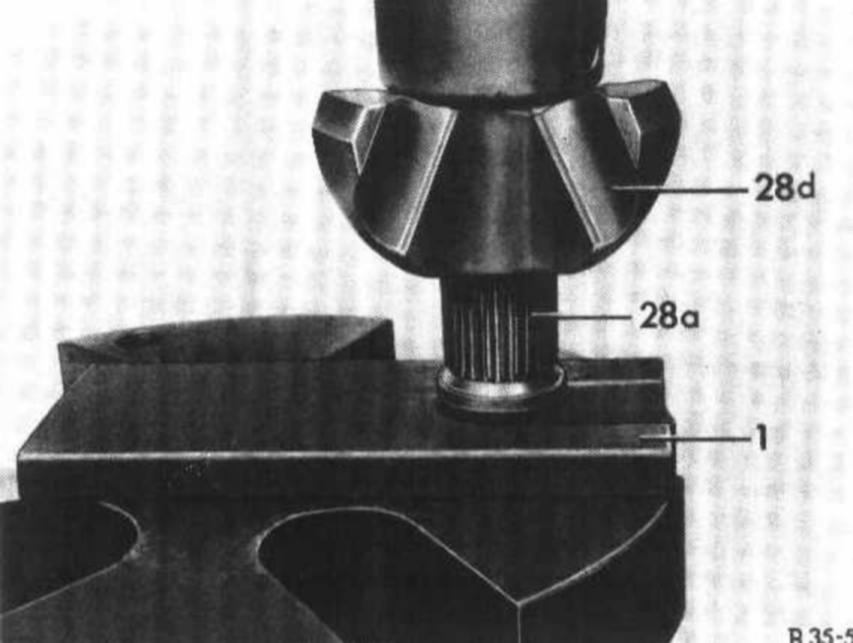
16 Press on spider joint hub (28d) of 1st version up to stop surface of rear axle shaft.
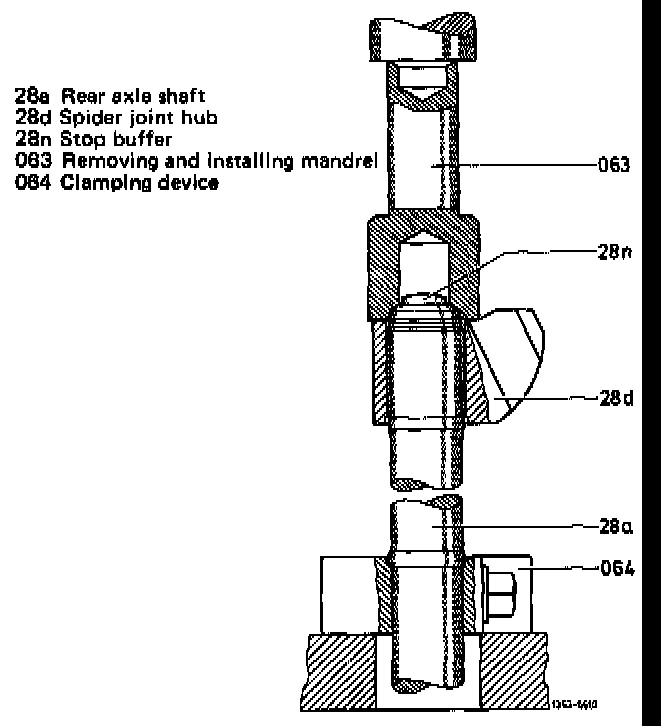
17 Press on spider joint hub (28d) of 2nd version (without stop surface) by means of installing mandrel (063) until mandrel rests against cone of rear axle shaft.
Attention! The minimum pressure of the joint hub against rear axle shaft should amount to 5000 N.
18 Mount locking ring, if installed. (Starting Jan.1973, the locking ring will no longer be installed).
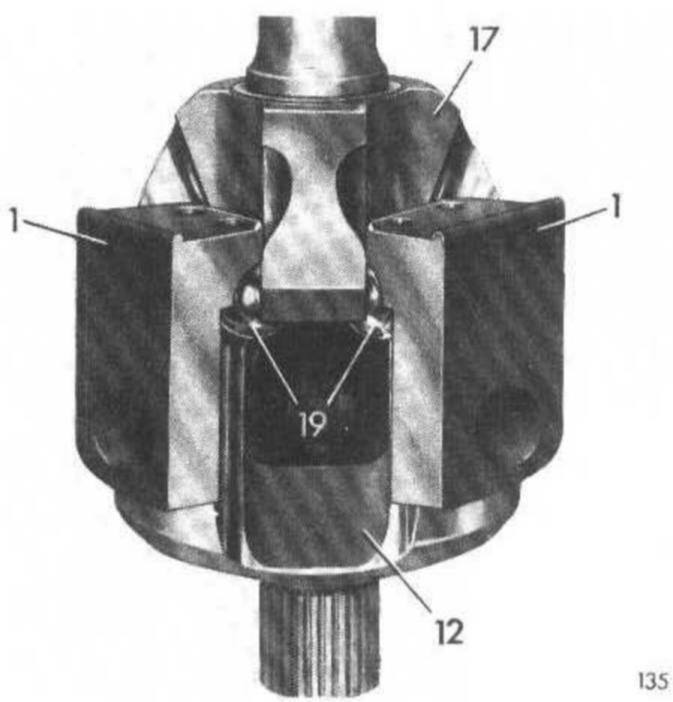
19 Assemble spider (12), the six balls (19) and the spider joint hub (17) with the aid of three magnetic ball holders (1).
Note: When new, the balls are mounted with a slight overlap. In used joint, balls and spider are moving somewhat easier. The rear axle shaft is completely replaced only whenever torsional play is showing up.
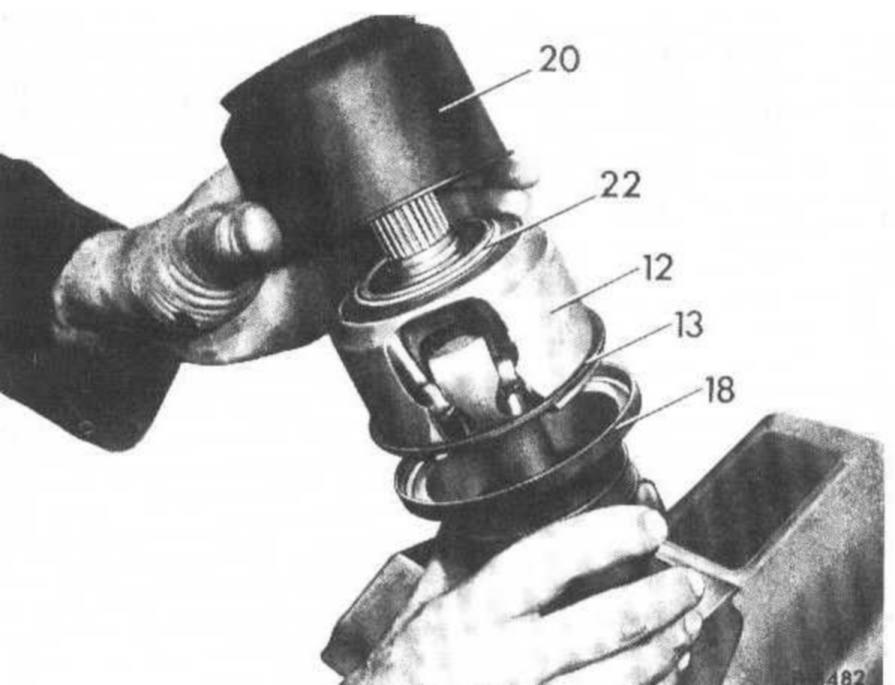
20 Place new sealing rings (13 and 22) on spider (12) and attach new protective sleeve (20).
21 Introduce rear axle shaft completely into beading tool (1) and insert split mounting ring (2).
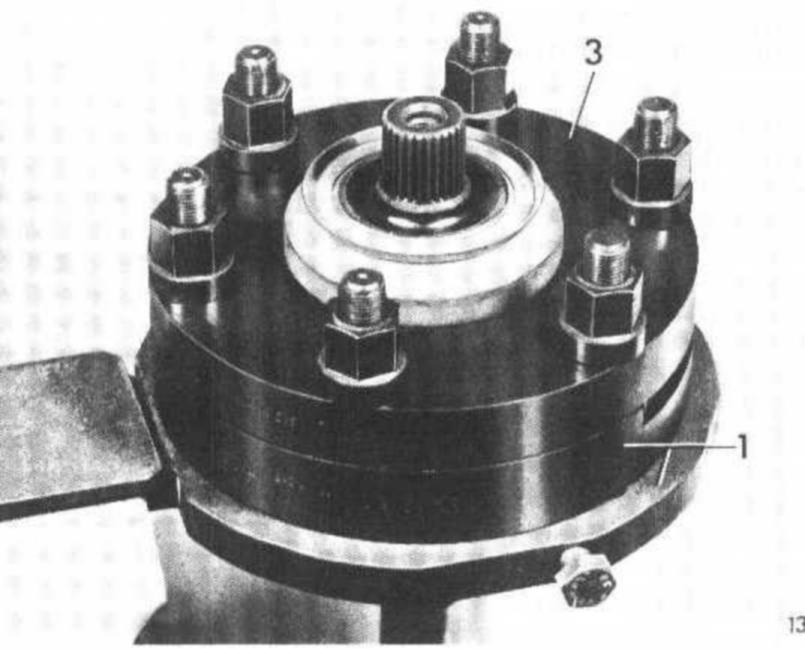
22 Mount beading ring (3) and screw in hex nut up to bead ring. Then tighten hex nut uniformly crosswise until bead ring rests against beading device (1).
23 Remove rear axle shaft out of beading tool.
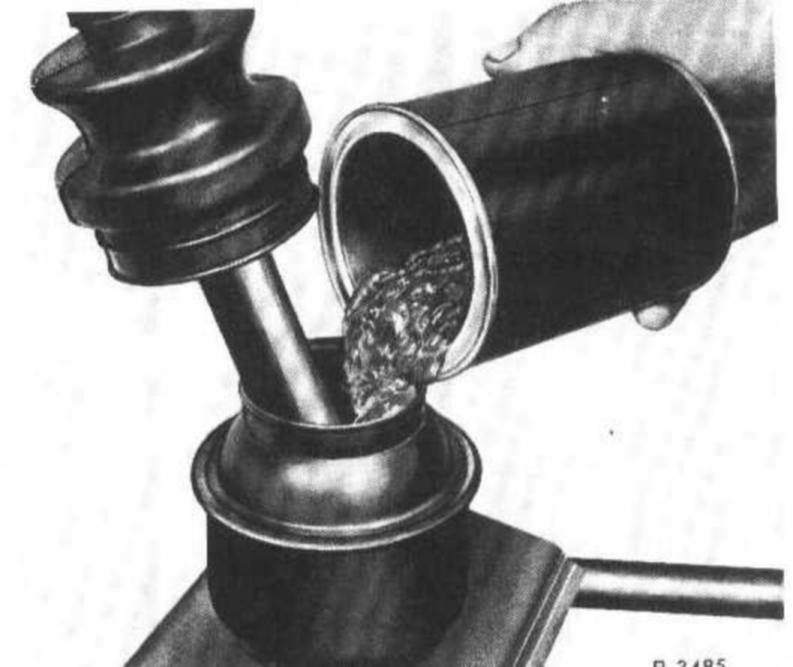
24 Fill synchromesh joint with spider joint oil.
Attention! Use specified lubricant only in specified quantity.
25 Attach rubber sleeve on stop sleeve and on rear axle shaft with new hose clips, while sliding sleeve up to bead machined on rear axle shaft.
Note: The screws of the two hose clips on one sleeve should always point in one direction. Align the screws of both hose clips on second sleeve of a rear axle shaft each turned by 180°.