Seals and Gaskets: Service and Repair
REPLACEMENT OF RADIAL SEALING RING ON DRIVE PINIONRemoval
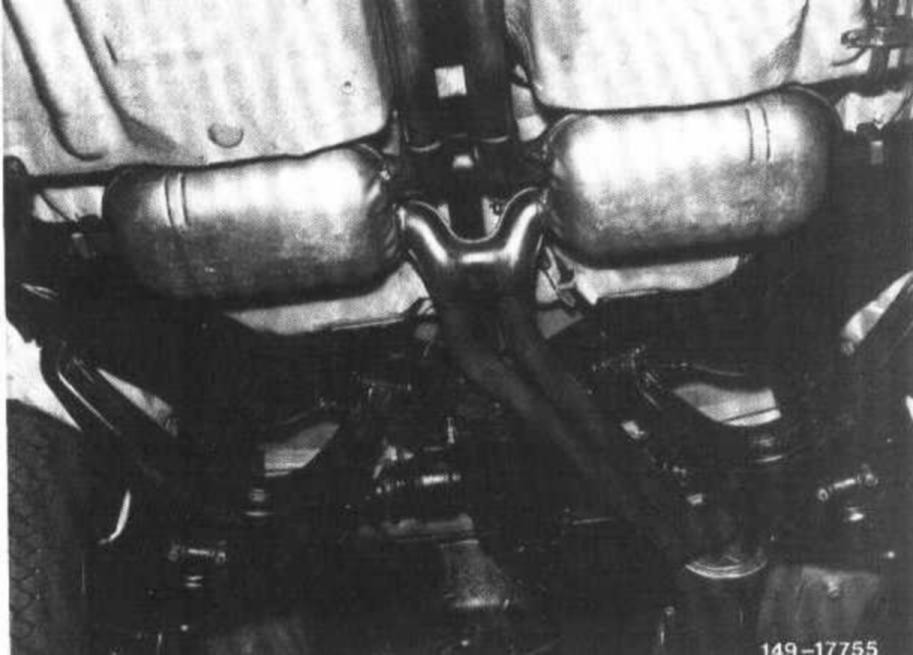
1 Remove exhaust system.

2 Unscrew shielding plate.
All models
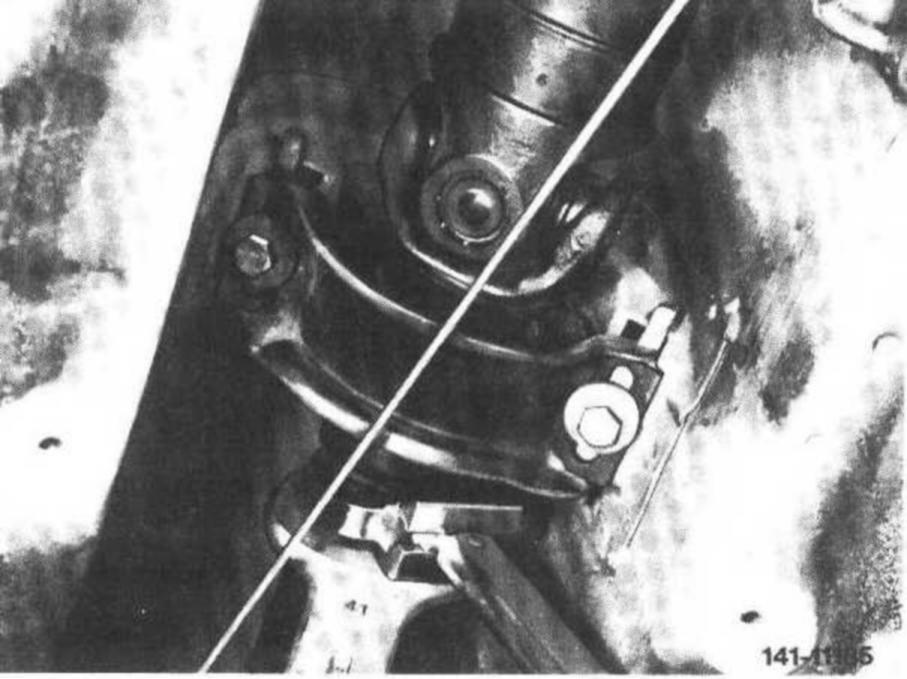
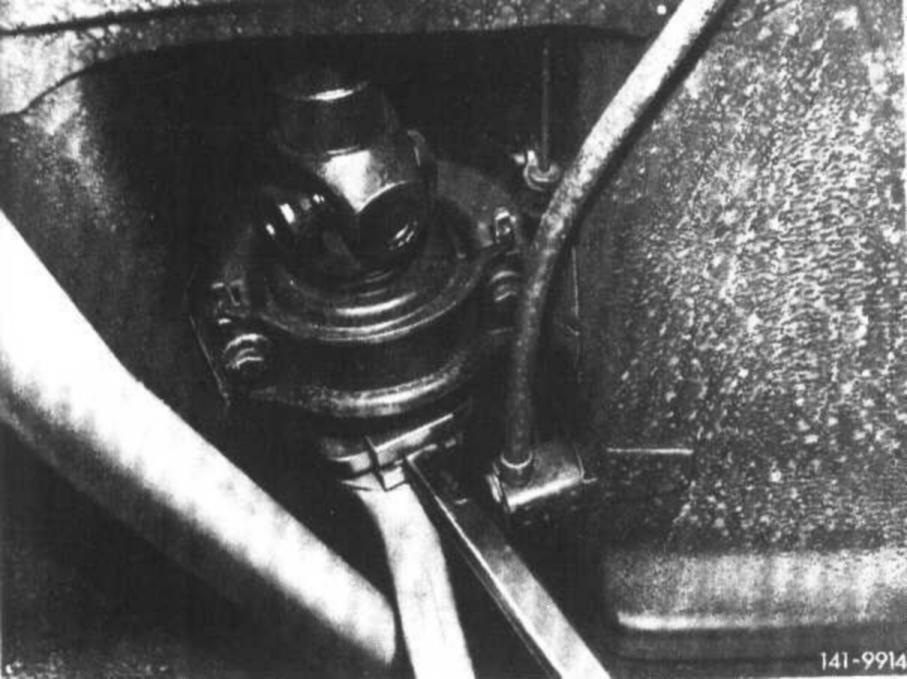
3 Loosen clamping nut and unscrew propeller shaft intermediate bearing on frame floor.
Note: On 3-piece propeller shaft loosen front lock nut only.
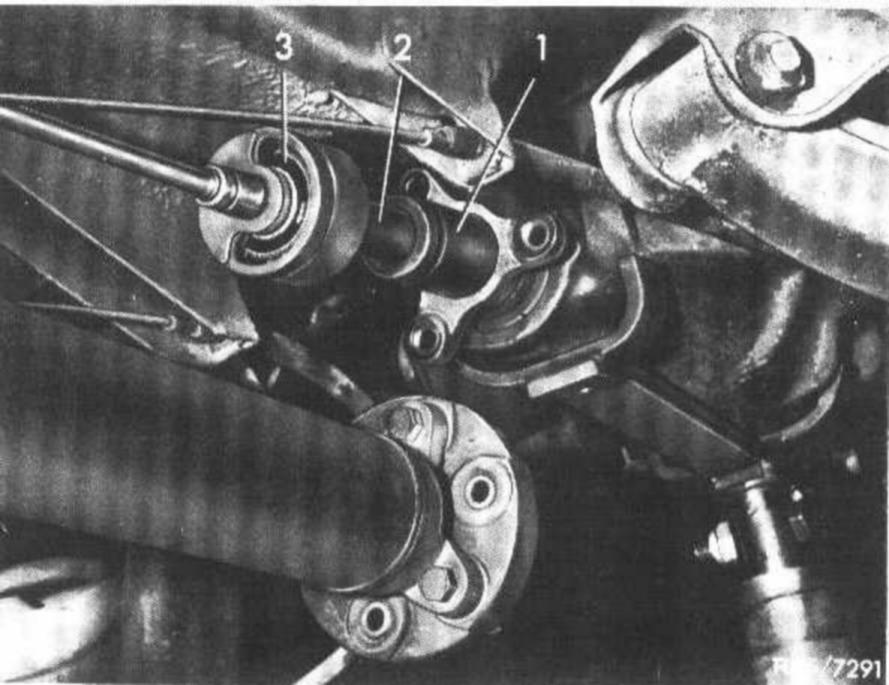
4 Unflange propeller shaft from rear axle and push forward out of concentric alignment.
5 Measure friction torque of complete rear axle drive and write down.
Attention! When measuring friction torque, make sure that the rear axle shafts are approximately horizontal and that neither the brake pads on brake discs nor the brake shoes of the parking brake are wiping against drum.
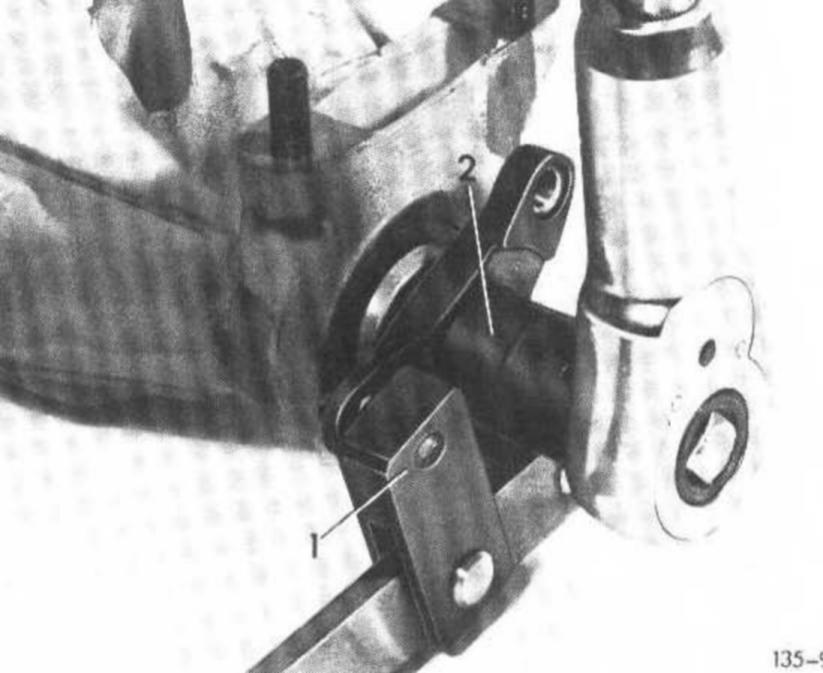
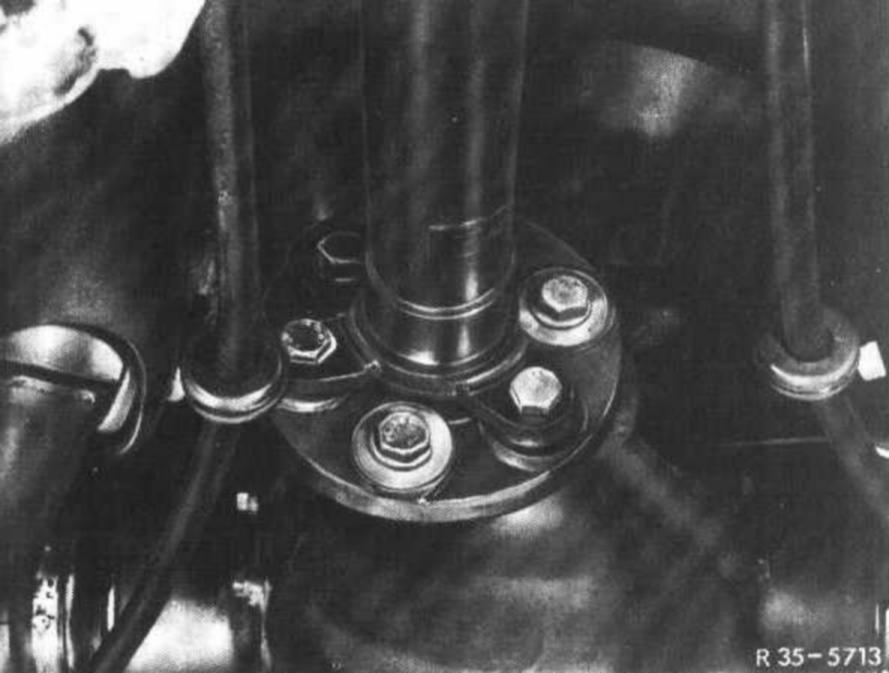
6 Plug holding wrench on universal flange and loosen slot nut or double hex. collar nut with slot nut socket or double hex. socket.
Note: Do not unlock on slot nut or double hex. collar nut with crush nut (since January 1974 or November 1981), but simply turn loose.
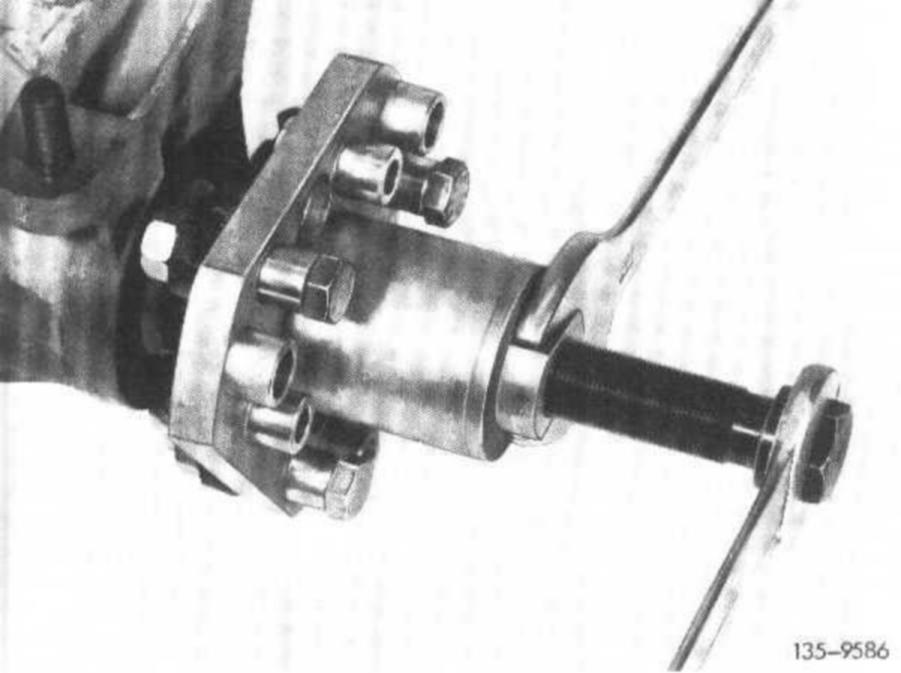
7 Pull universal flange from drive pinion, using puller, if required.
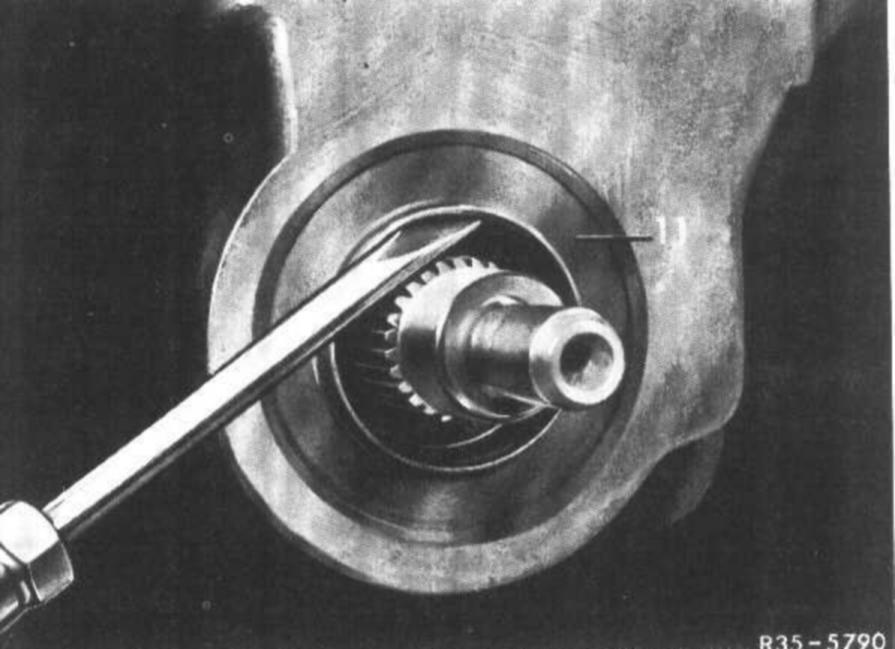
8 Force radial sealing ring out of rear axle housing by means of a screwdriver.
9 Check running surface for radial sealing ring on universal flange. Replace universal flange, if running surface is worn.

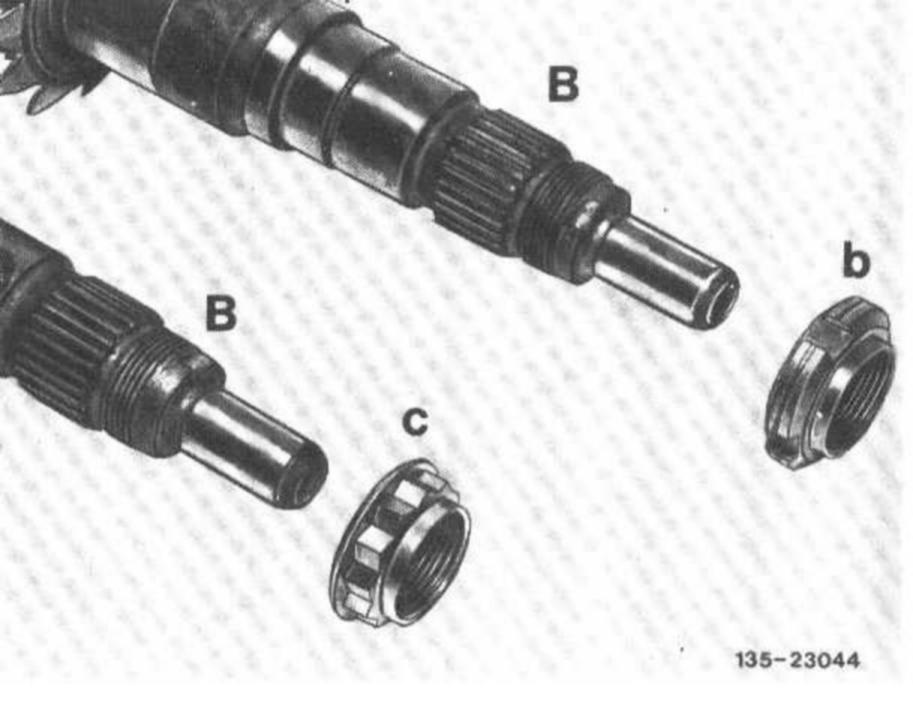
Note: Starting November 1979, only radial sealing rings with oil return feed thread and rubber-coated sheet-metal jacket will be available (B, arrows). This change eliminates the ground thread on universal flange.
Installation

10 Coat radial sealing ring with rubber-coated sheetmetal jacket on OD with rubber sliding compound "naphtalene H or hypoid gear oil" and knock-in up to stop in rear axle housing by means of thrust piece (1).

11 Plug-on joint flange and carefully tighten with a new slot nut until measured or recorded friction torque has been attained. Tightening torque of slot nut should amount to at least 180 Nm. If this minimum tightening torque is not attained, replace elastic spacing sleeve.
Attention! On drive pinion of 1st version without groove on threads (A) mount self-locking slot nut (polystop slot nut, a) only.
On drive pinion of 2nd version with groove (B) optionally use a crush slot nut (b) with a groove on circumference, or a double hex. collar nut (c). Other installation combinations are not permitted.
Crush Slot Nut:
Double Hex Collar Nut:
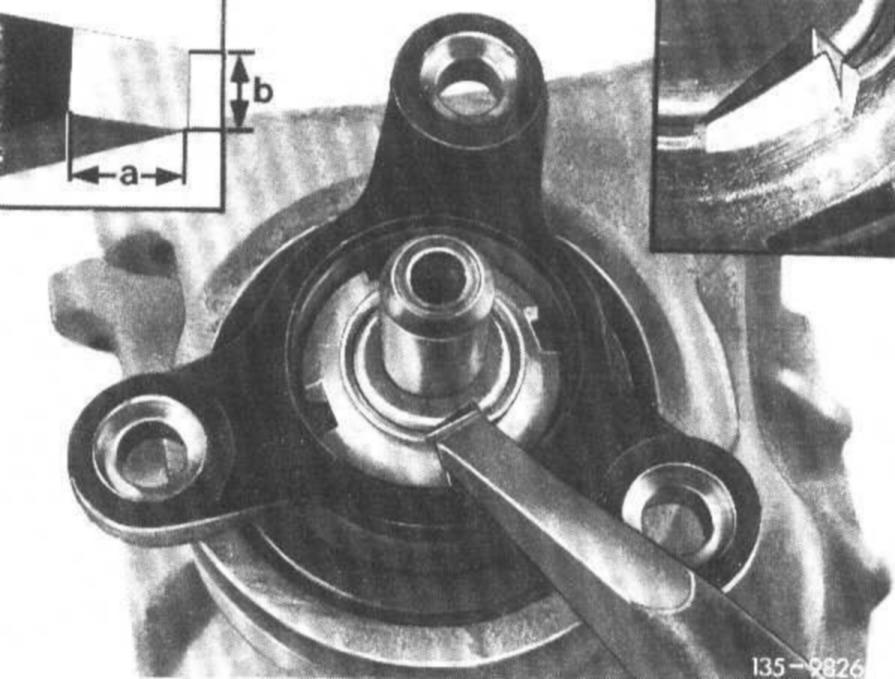
12 Peen crush slot nut or double hex. collar nut with a peening tool into one of the two grooves of drive pinion in such a manner that no gap shows up between groove and locking tab.
Attention! Blows should not be too heavy.
Dimensions for peening tool: "a" = approx. 8 mm; "b" = approx. 4 mm
13 Attach propeller shaft to flange.
14 Attach propeller shaft intermediate bearing but do not yet tighten.
15 Fill rear axle housing with oil up to level of filler hole.
16 Tighten lock nut on propeller shaft to 3040 Nm.
17 Tighten propeller shaft intermediate bearing.
18 Mount shielding plate.
19 Install exhaust system.