Rear
Removal and installation of rear shock absorberNote: The rear shock absorbers simultaneously serve as a deflection stop for the rear wheels. For this reason, loosen shock absorber suspension only when the vehicle rests on its wheels or when the semitrailing arm is supported.
If the shock absorber must be removed because of rumbling noises or premature leaking of piston rod seal, the alignment of The suspension points inside vehicle must be checked and if necessary corrected.
In the event of repairs and independent of make, the shock absorbers can be individually exchanged. Shock absorber versions identified by color code, e.g. 1 lengthwise line whiter or 1 crosswise line white, must be in agreement.
Attention! When removing gas pressure shock absorbers with separating piston or with piston mounted at top, with vehicle jacked up and axle half relieved, make sure that the piston rod is not turning along when loosening upper suspension. Since in this condition the resilience stop in shock absorber rests against operating piston, the attachment of operating piston to piston rod may become loose. The gas pressure would then suddenly extend piston rod and the oil in shock absorber would flow Out (risk of an accident).
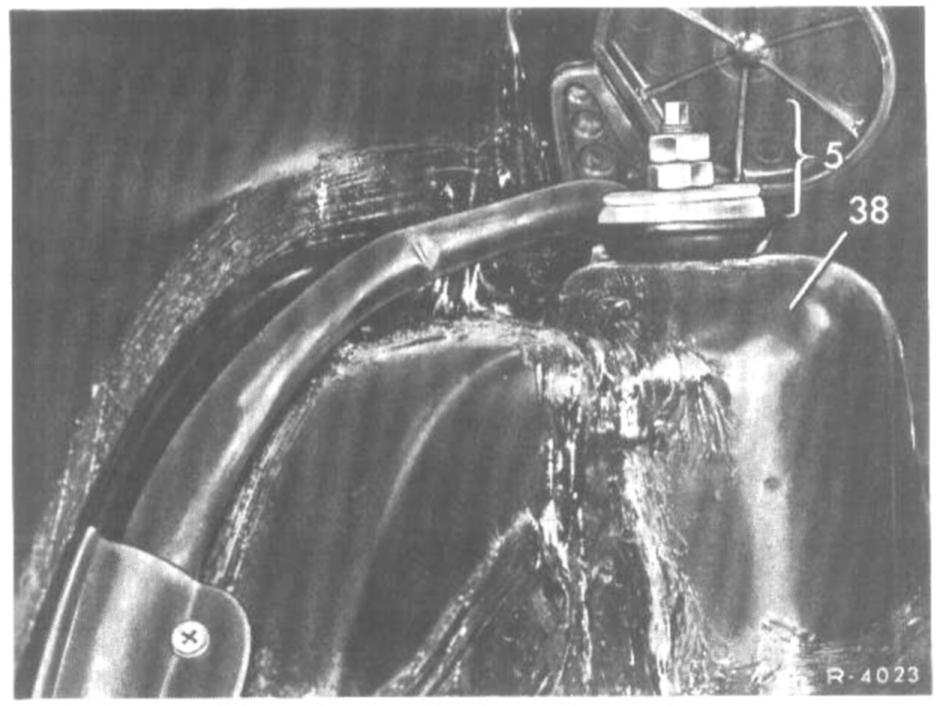
Removal - Upper suspension
Model 107.02
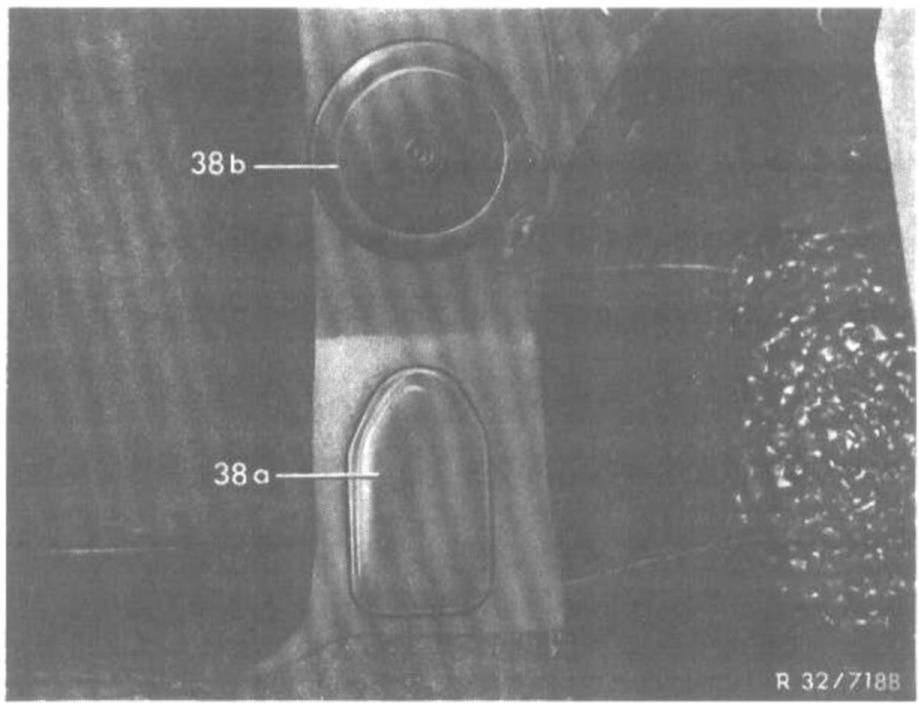
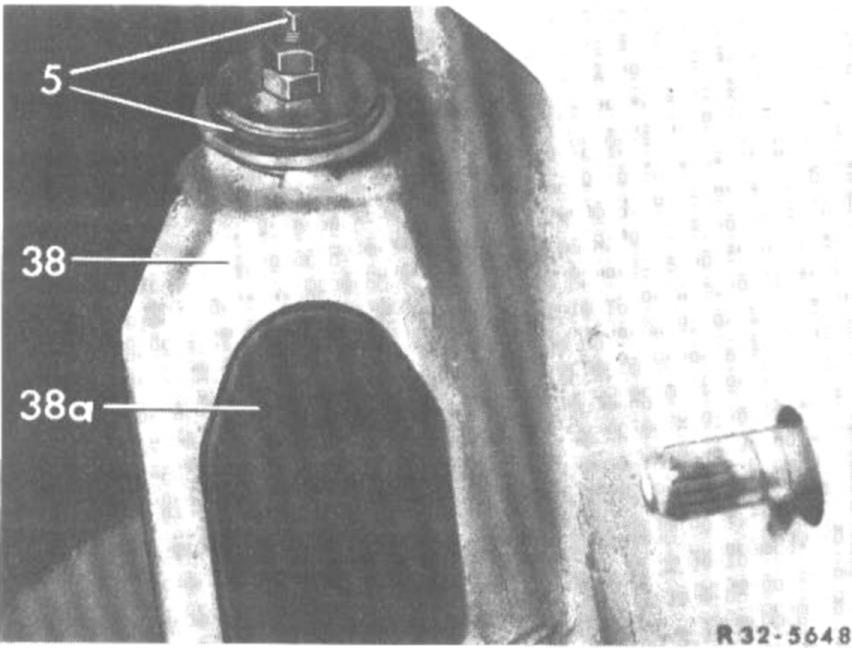
38a Cover plate for spring strut connection
38b Cover plate for shock absorber suspension
1. Remove rear seat and backrest.
2. Remove cover plate.
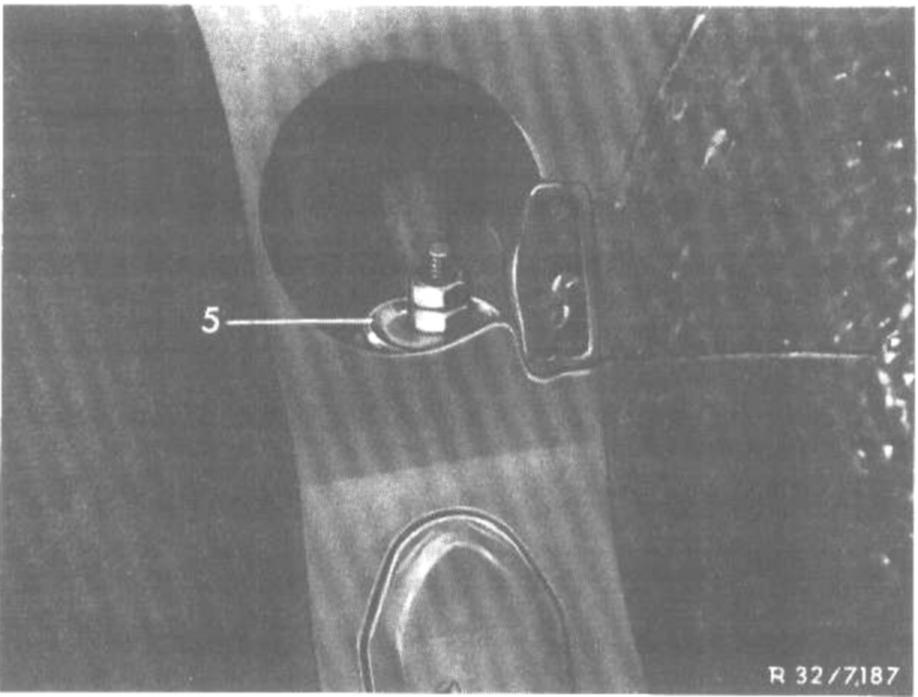
3. Unscrew hex. nuts on upper suspension (5) and remove rubber ring.
Model 107.04
4. On vehicles with coupe top, remove top and open cover flap.
5. Remove rear seat, unscrew backrest and remove.
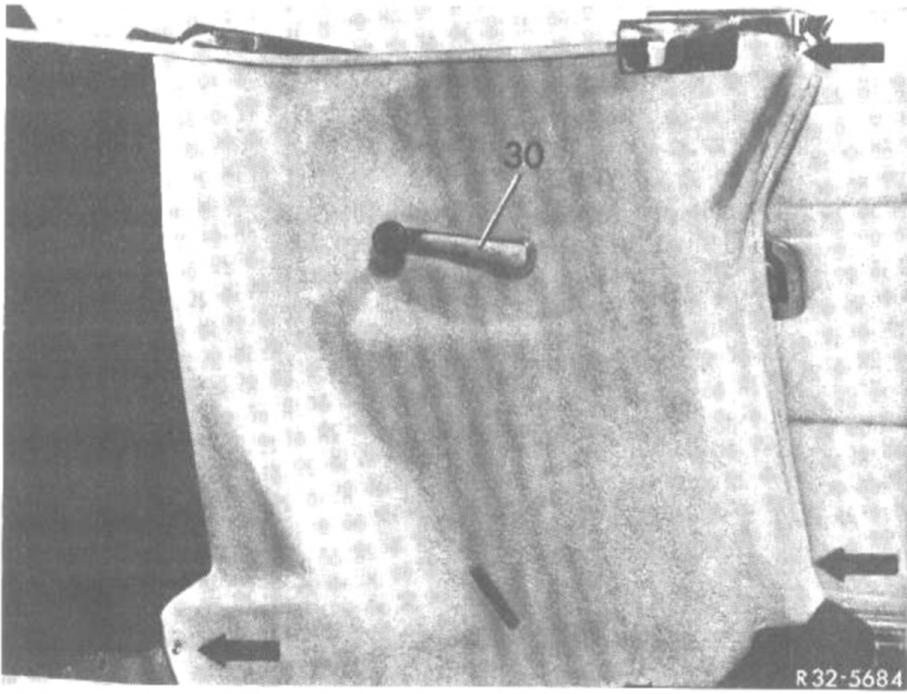
6. Remove cover flap locking lever (30) and unscrew lining (refer to arrow).
7. Unscrew hex. nuts on upper suspension (5) and remove rubber ring.
Model 114,115
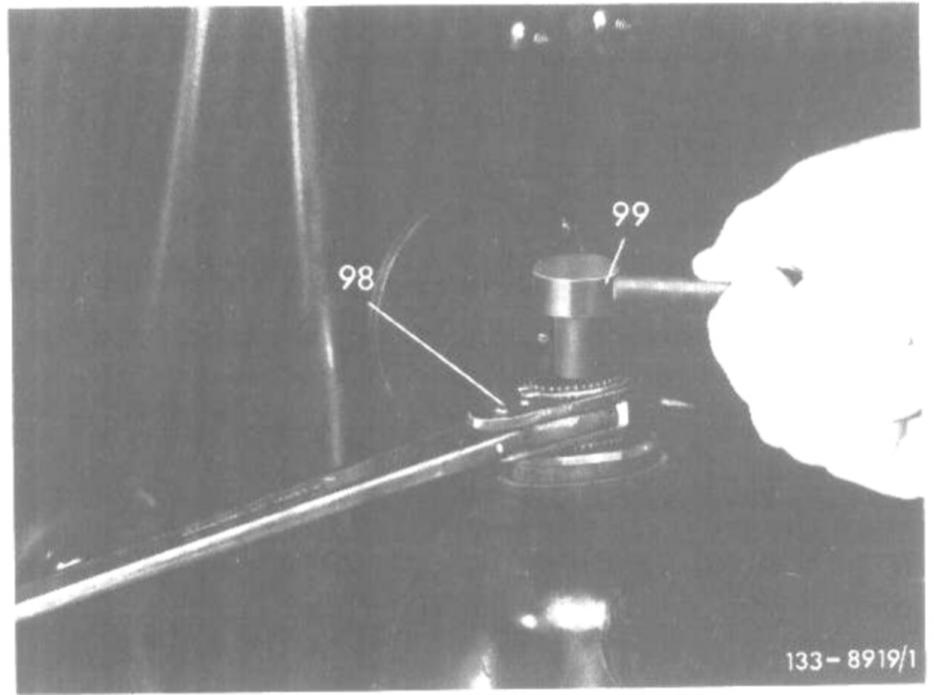
98 Hex ratchet wrench
99 Retaining wrench
8. Unscrew hex. nuts on upper suspension from direction of trunk, remove disk and rubber ring.
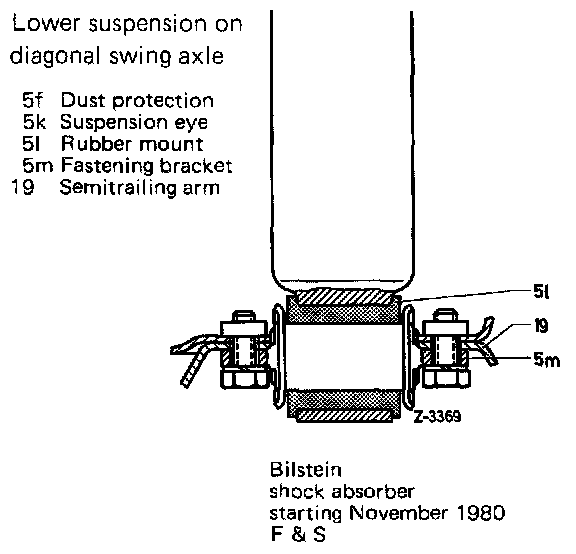
Removal - Lower suspension
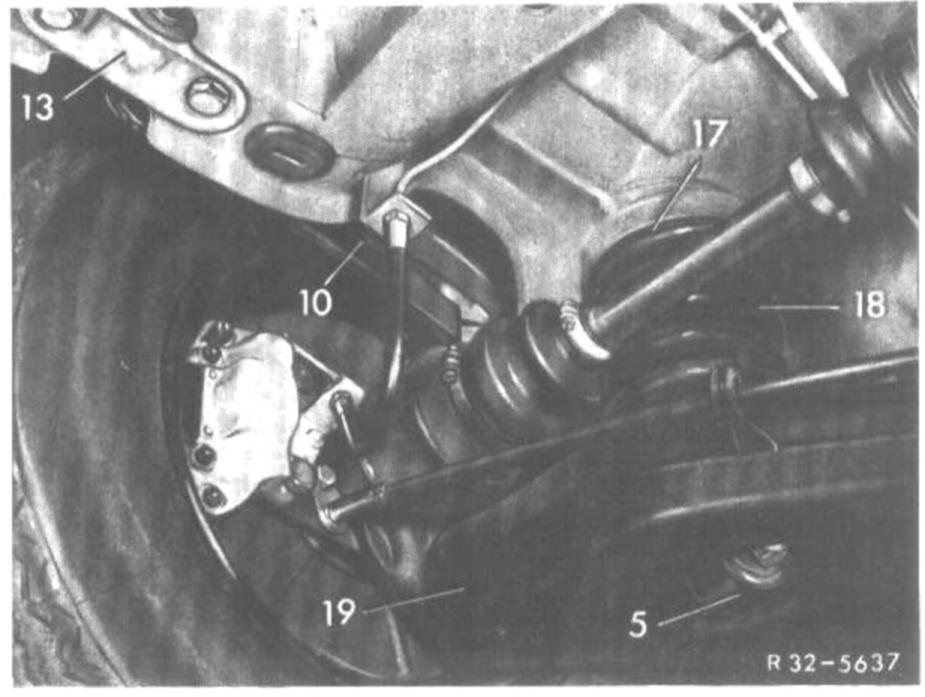
9. Unscrew hex. screws or nuts (vehicles with diagonal swing axles and starting torque compensation) of lower suspension on semitrailing arm and remove shock absorber in downward direction.
Installation
10. Check suspension members. Fastening clip of lower shock absorber suspension should be firmly seated in rubber mount, rubber mount should not be rotable in suspension eye.
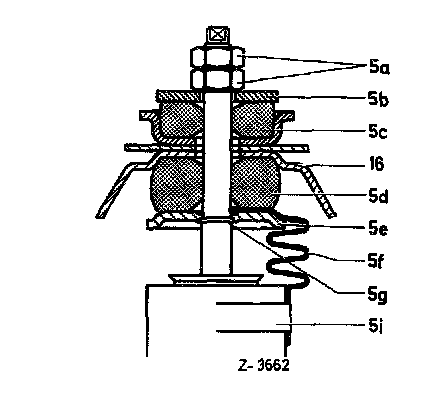
11. Insert shock absorber and mount upper suspension, making sure that the parts are correctly seated. Tighten the lower of the two hex nuts to end of thread, then counterlock with the upper nut.
Note: The dust protection (5f) is installed only on vehicles for countries with poor road conditions.
12. Mount lower suspension to semitrailing arm. It vehicle is resting on its own wheels, jack vehicle up at the rear until semitrailing arm is at level of fastening bracket on shock absorber.
13. On vehicles of 107 model series install linings, backrest and rear seat, as well as coupe top, if applicable.
Note: On lower shock absorber suspension, two hex. bolts are screwed into semitrailing control arm of the diagonal swing axle.
On diagonal swing axle with starting torque compensation, two special bolts are inserted into the semitrailing control arm from above and retained by a pressed-on retaining disc.
If required: Renew special bolts on lower shock absorber suspension in semitrailing control arm. With shock absorber removed, knock bolts out from below using a suitable punch.
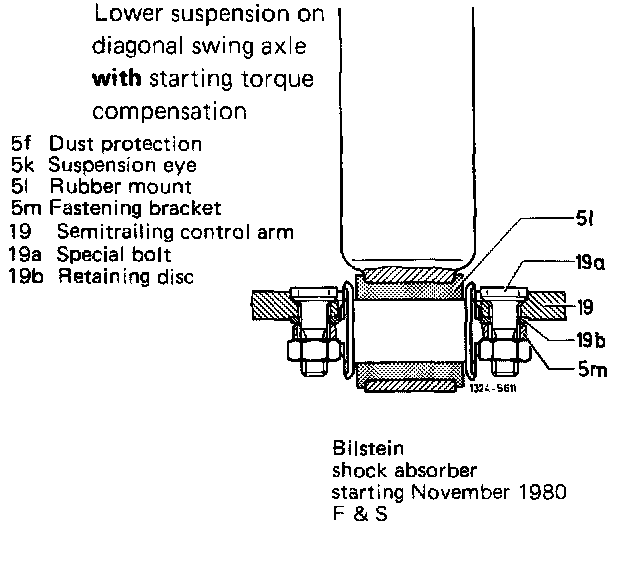

After inserting new special bolts into bores in semitrailing control arm, press retaining discs on shank of special bolts. Add approx. 5 washers with an ID of 10.5 mm to the retaining disc and press the retaining disc down on to the shank of the special bolt.