Steering Wheel without Airbag
REMOVE AND INSTALL STEERING WHEEL WITHOUT AIR BAG
Tightening Torques Nm (kpm)
Hex. nut for attaching steering wheel to steering shaft 50 (5)
Hex. nut M 18 x 1.5 or countersunk screw
for attaching steering wheel to steering shaft 80 (8)
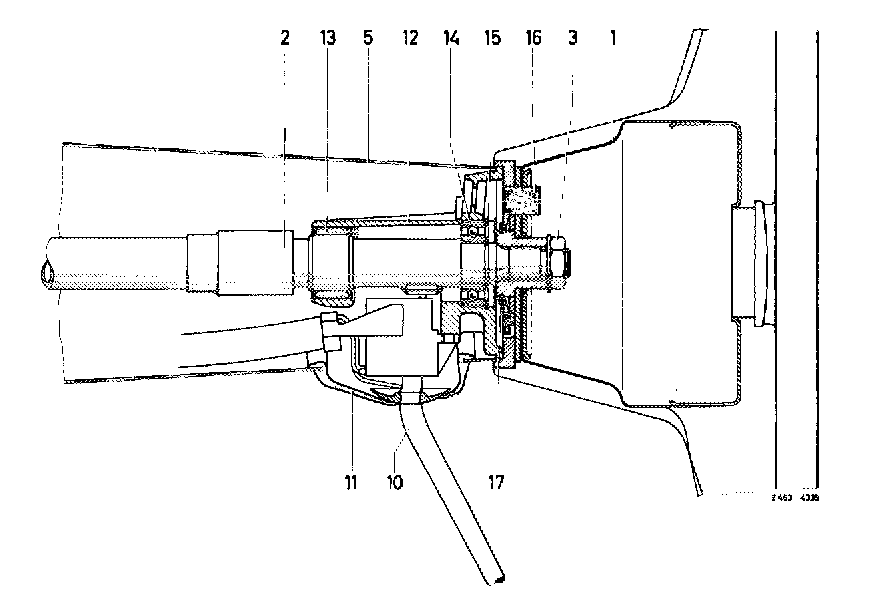
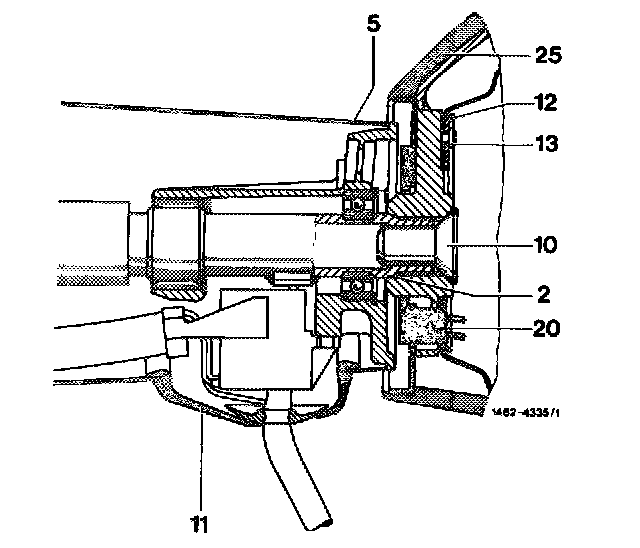
1 Steering wheel
2 Steering shaft
3 Hex. nut with spring washer
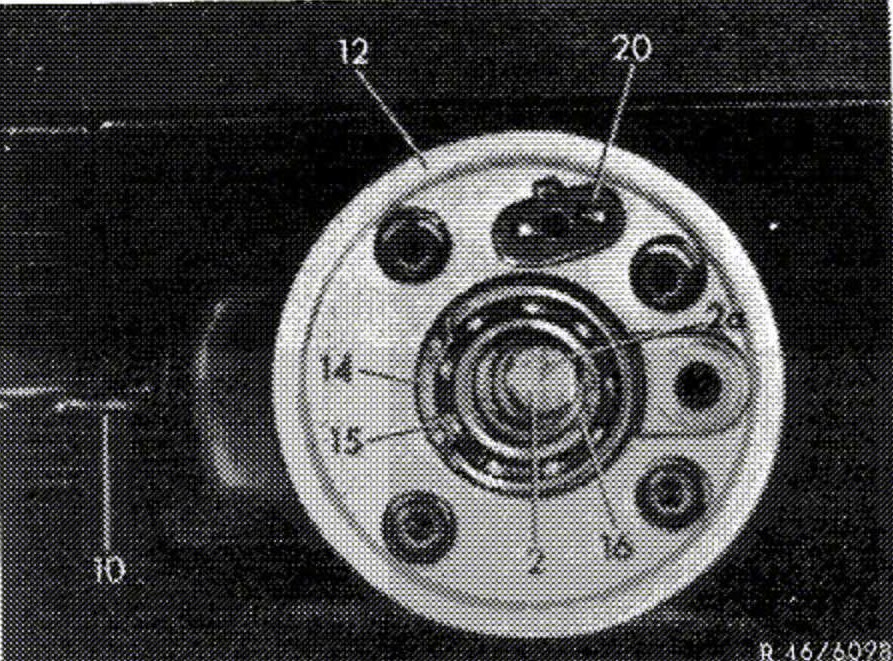
5 Jacket tube
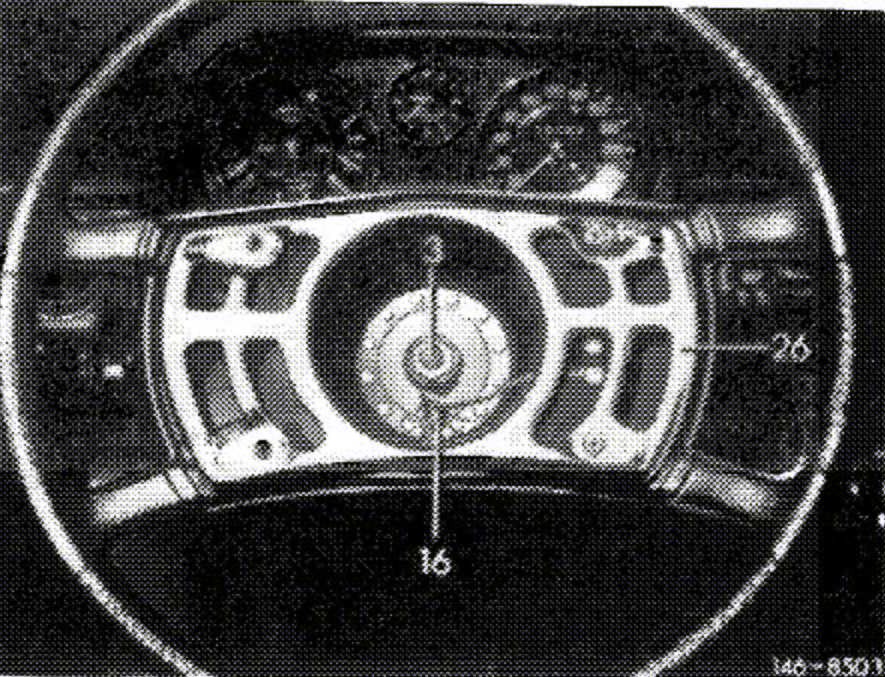
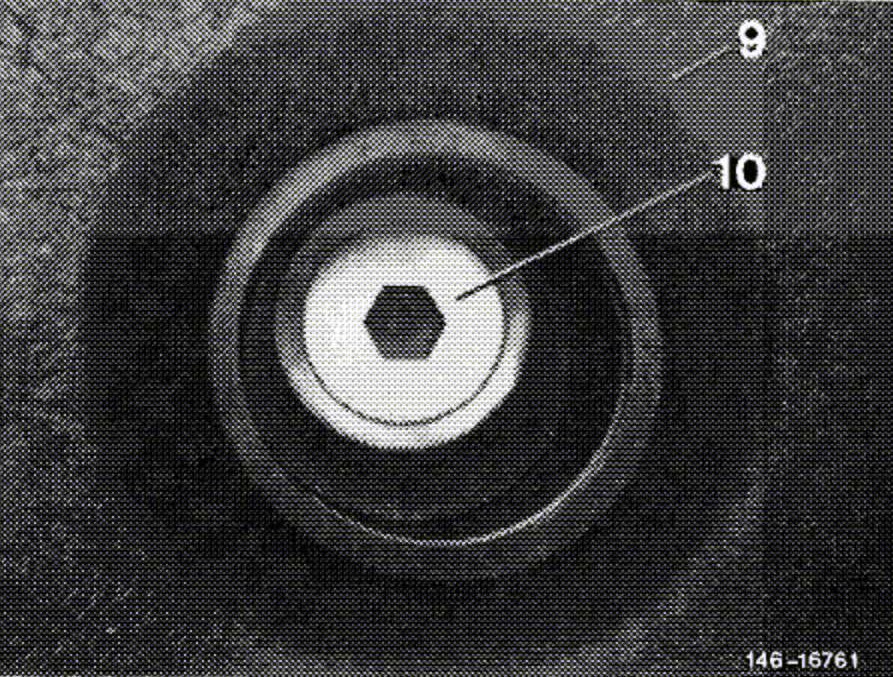
10 Combination switch
11 Rubber cover
12 Bearing body
13 Needle bearing
14 Radial ball bearing
15 Locking ring
16 Slide ring
17 Locking ring
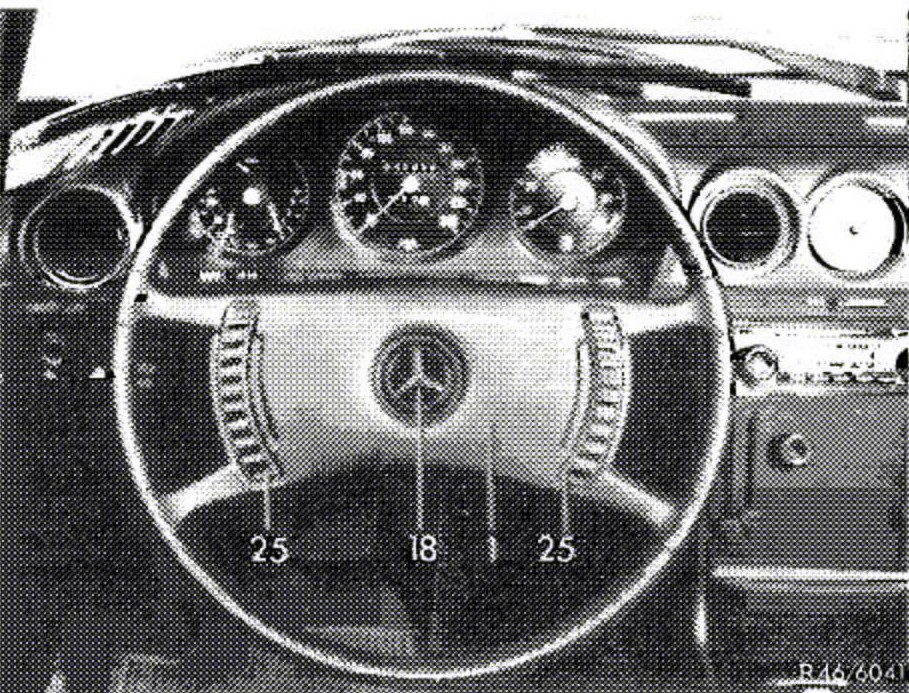
A. 1st version, plastic-foamed steering wheel (polyurethane). Production up to end of 1972
Removal:
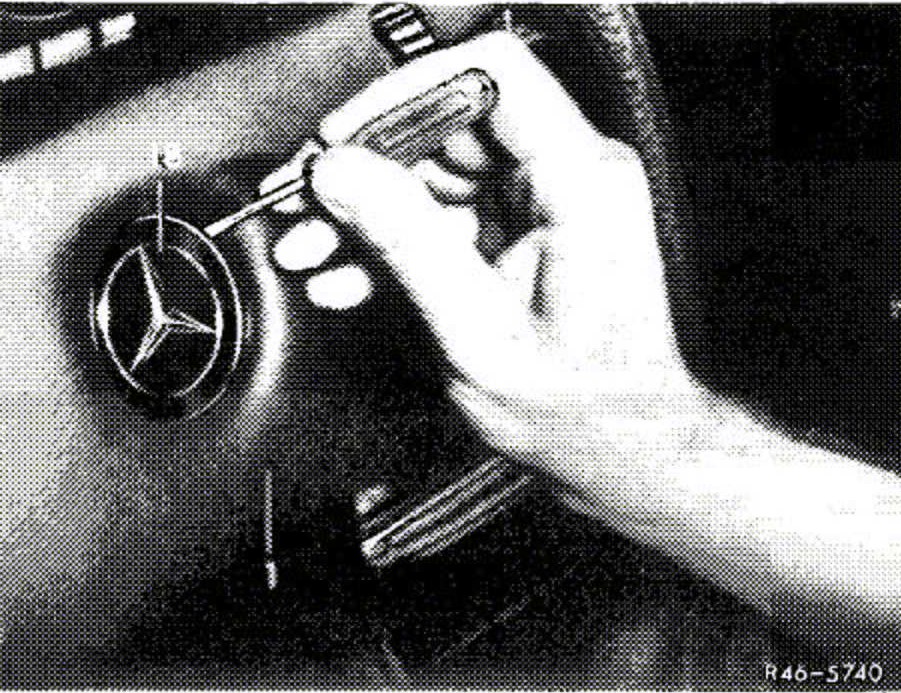
1. Carefully lift company symbol (18) out of padded plate by means of a small screw driver.
2. Unscrew hex. nut (3) and remove spring washer as well as steering wheel from steering shaft (2).
Installation:
3. Turn steering shaft (2) in such a manner that the marking line (2a) is pointing accurately upwards.

4. Mount steering wheel on splining of steering shaft, paying attention to horizontal position of spokes on steering wheel, the slightly curved spoke should be below.
5. Place hex. nut in a socket wrench, mount spring washer and glue to socket wrench with adhesive tape.
Screw hex. nut on steering shaft, making sure that the spring washer is not dropping from socket wrench. Remove adhesive tape from socket wrench, then tighten hex. nut to 50 Nm (5 kpm). Push company symbol into steering wheel.
6. During test drive, check position of steering wheel with road wheels in straight-ahead position. If the position of the steering wheel while driving straight ahead is not in alignment with front wheels, check toe-in and correct, if required. If the steering wheel position requires still further correction, the steering wheel can be displaced to the left or right in splining (max. 2 teeth).
7. Check signal horns for function and also check automatic return of combination switch.
Note:
Dirty or sticky steering wheels can be cleaned with a neutral household cleaning compound by washing steering wheel with a luke-warm solution of the compound.
Do not use abrasive compounds since they will attack the plastic foaming.
B. 2nd version, steering wheel plastic-foamed (polyurethane). Production starting 1973
Removal:
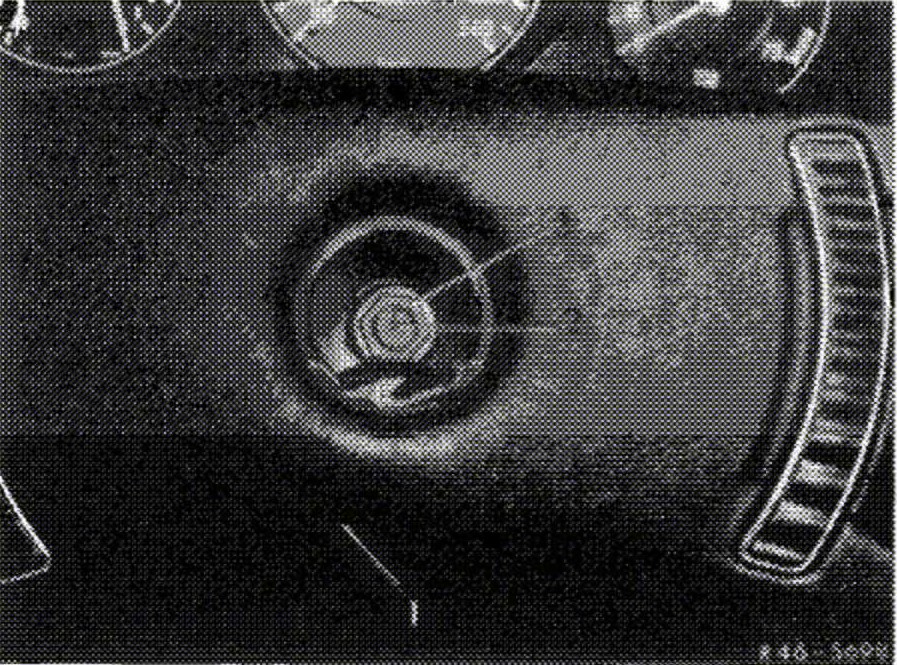
1. Pull off padded plate (25) from signal carrier in upward direction. Pulling off is done best at a corner of the padded plate in range of one of the two steering wheel spokes.
2. Unscrew hex. nut (3). Remove spring plate first, then steering wheel from steering shaft.
Installation:
3. Turn steering shaft (2) in such a manner that the marking line (2a) is pointing accurately upwards.
4. Position steering wheel on splining of steering shaft, making sure of horizontal position of spokes on steering wheel; the slightly curved spoke should be below.
5. Place spring plate on steering shaft, screw-on hex. nut and tighten to specified torque.
Note:
The steering wheel with large hub dia. has no spring washer.
Tightening torque of hex. nut:
M 14 x 1.5 = 50 Nm (5 kpm)
M 18 x 1.5 = 80 Nm (8 kpm)
6. Attach padded plate to signal carrier. Suitably, fastening of padded plate is started at a corner in range of steering wheel spokes. Do not use force, so that the signal carrier is not damaged.
7. During test drive, check position of steering wheel in straight-ahead position of road wheels. If the steering wheel position while driving straight ahead is not in alignment with front wheels, check toe-in and make corrections, if required. If the steering wheel position then also requires a correction, the steering wheel can be displaced in splining to the left or to the right (max. 2 teeth).
8. Check signal horns for function, also check automatic return of combination switch.
Note:
Dirty or sticky steering wheels can be cleaned with a neutral household cleaning compound by washing steering wheel with a luke-warm solution of the compound.
Do not use abrasive compounds since they will attack the plastic foaming.
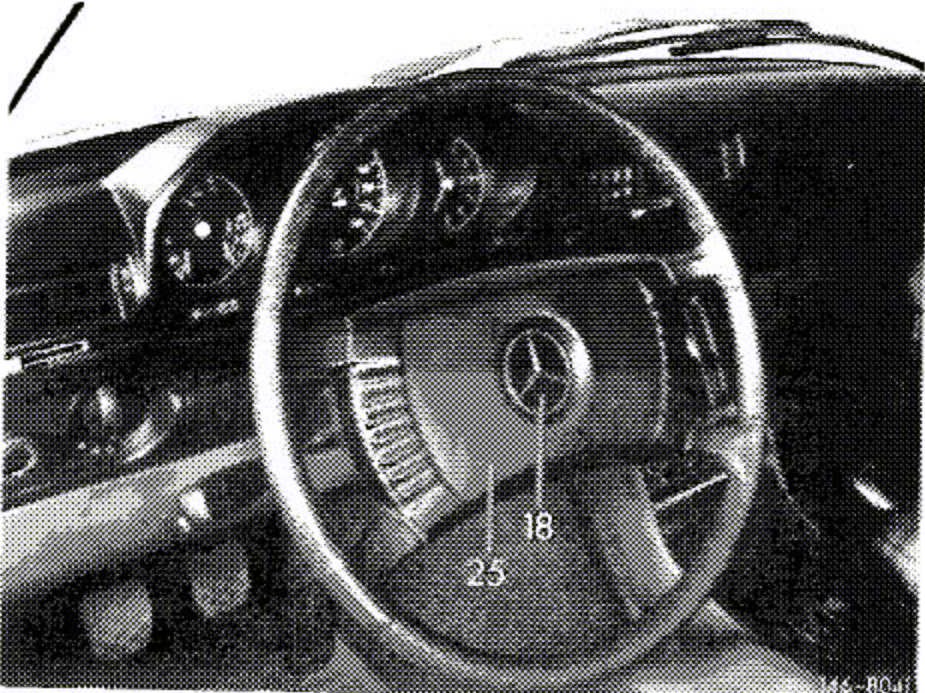
C. 3rd version, steering wheel plastic-foamed (polyurethane). Production starting end of 1979
Removal:
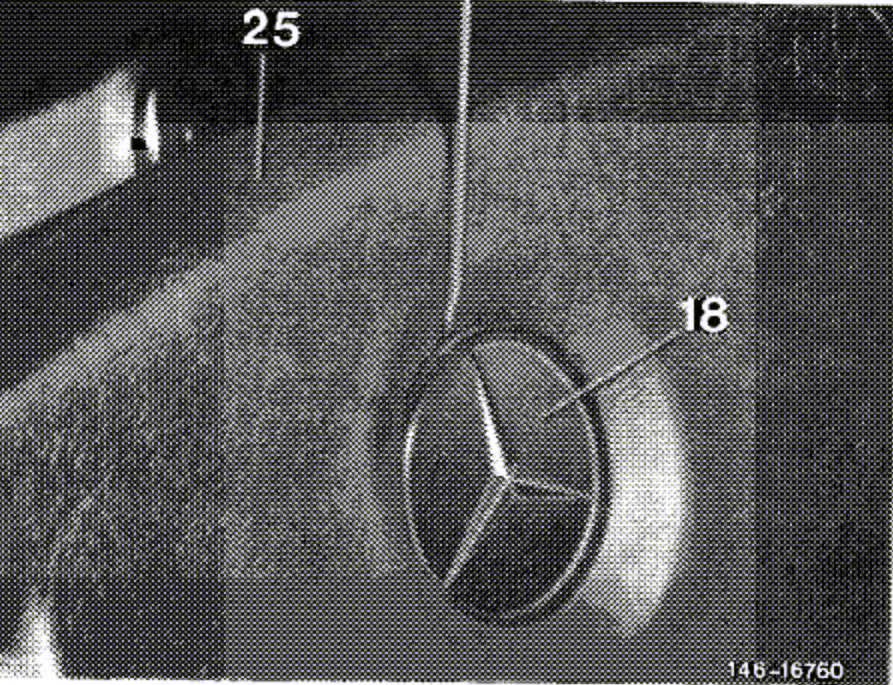
1. Carefully lift company symbol (18) from padded plate with a small screwdriver.
Note:
To prevent damage, do not pull padded plate from signal carrier.
2. Unscrew countersunk screw (10) from steering shaft with steering lock engaged and remove steering wheel.
Installation:
3. Turn steering shaft (2) in such a manner that the marking line (2a) is pointing accurately upwards
4. Place steering wheel on splining of steering shaft while paying attention to horizontal position of steering wheel spokes; the slightly curved spoke should be below,
5. Screw countersunk screw (10) into steering shaft with steering lock engaged and tighten to 80 Nm (8 kpm).
Note:
Always replace countersunk screw with micro-encapsulated threads.
6. Insert company symbol into padded plate.
7. During test drive, check position of steering wheel in straight ahead position of wheels. If the steering wheel position while driving straight ahead is not in alignment with front wheels, check toe-in and correct, if required. If the steering wheel position still requires correction, displace steering wheel in splining to the left or right (max. 2 teeth).
6. Check signal horns for function and automatic return of combination switch.
Note:
Dirty or sticky steering wheels can be cleaned with a neutral household cleaning compound by washing the steering wheel with a luke-warm solution of the cleaning compound.
Do not use abrasive compounds since they will attack the plastic foaming.