Steering Wheel with Airbag
REMOVE AND INSTALL STEERING WHEEL WITH AIR BAGTightening Torque Nm
Oval head screw with intorx 6
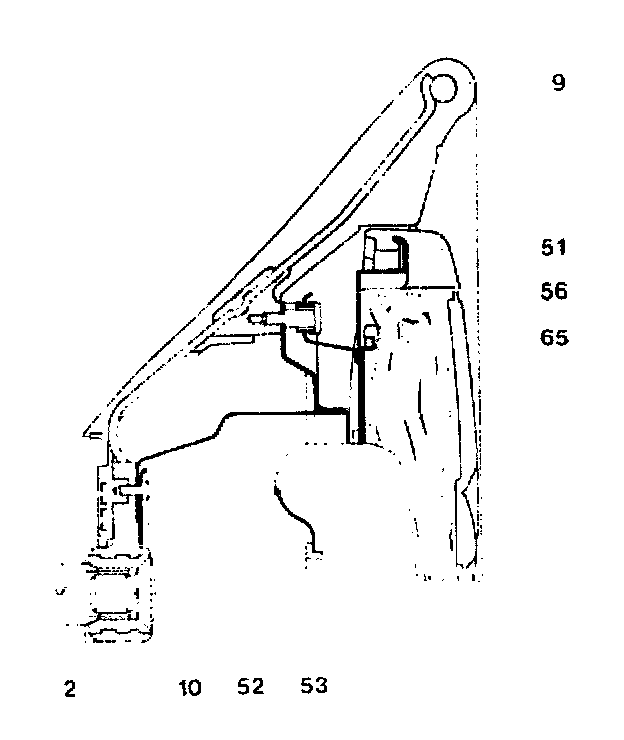
2 Steering shaft
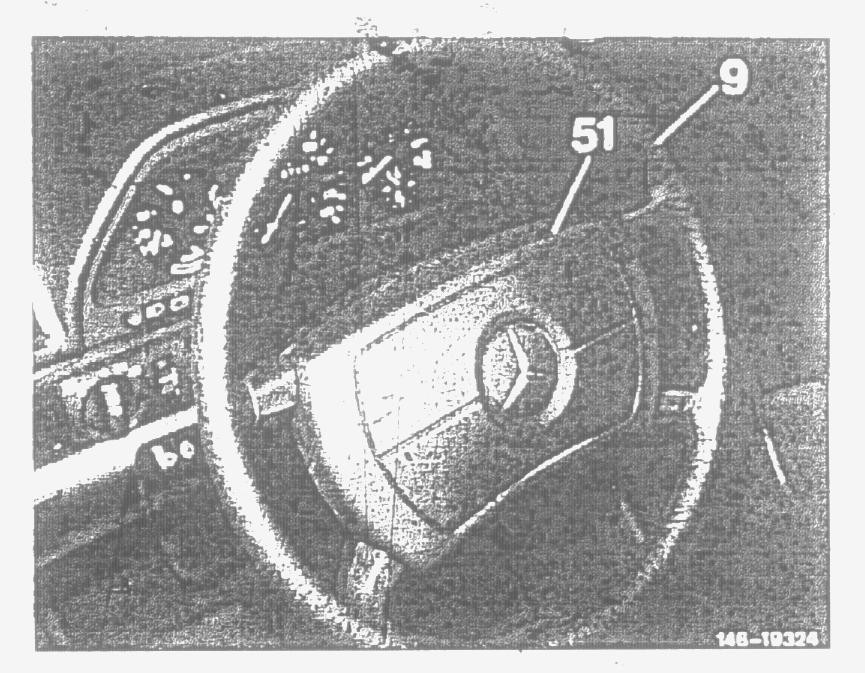
9 Steering wheel
10 Countersunk screw
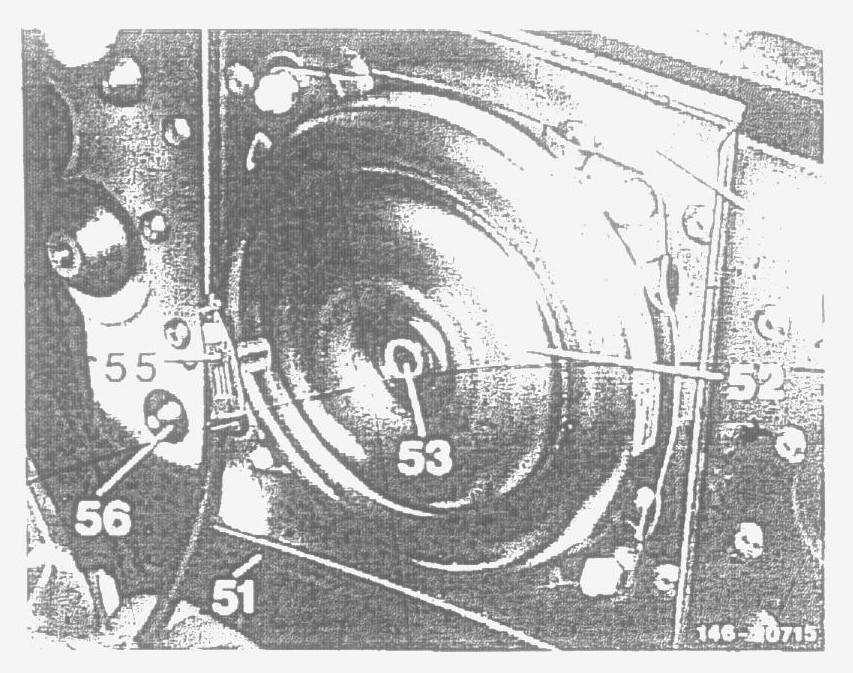
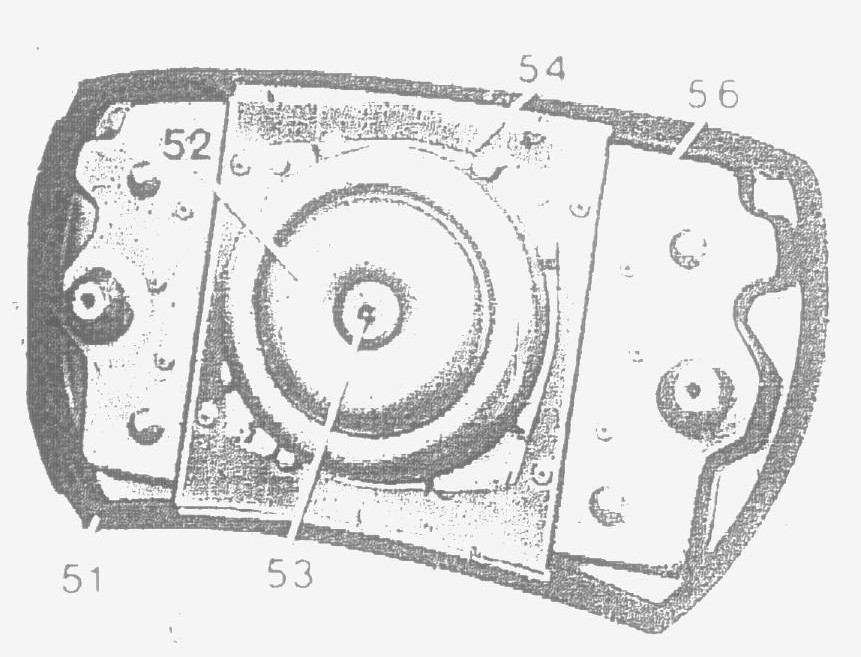
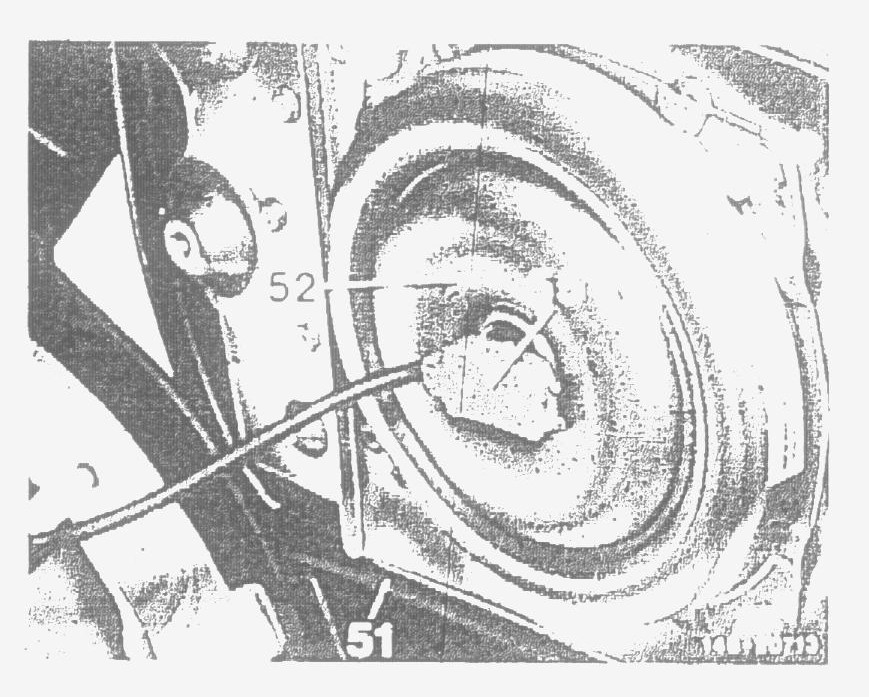
51 Airbag unit
52 Gas generator
53 Gas generator connector
56 Generator carrier
65 Airbag
Removal:
1. Disconnect grounding cable on battery, cover pole and turn ignition key to zero position.
2. On 1st version, installed up to March 1987, remove front cover under instrument panel and pull red 10-point connector of releasing device.
1st Version on Pedal-Operated Parking Brake:
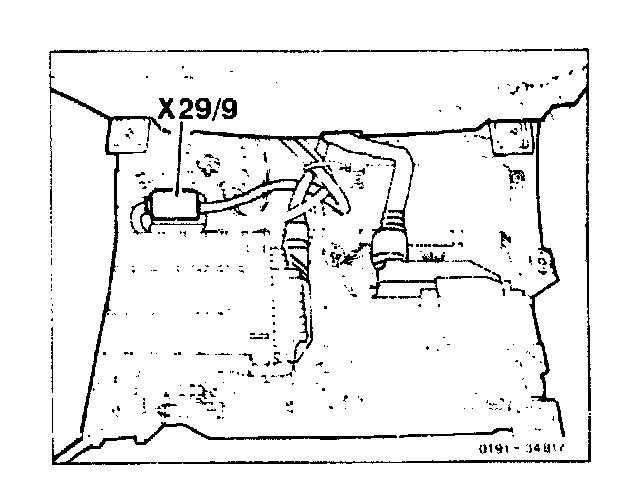
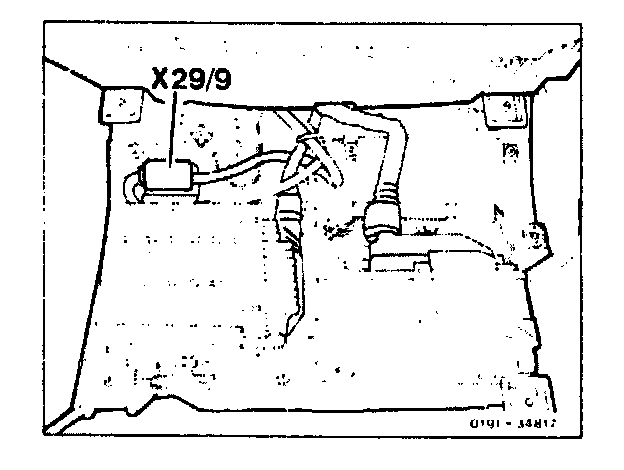
3. On 2nd version, installed starting April 1987. remove floor mat in front passenger's footwell and pull off 10 point connector (X29/9) of releasing unit
2nd Version on Plate in Front Passenger's Footwell:
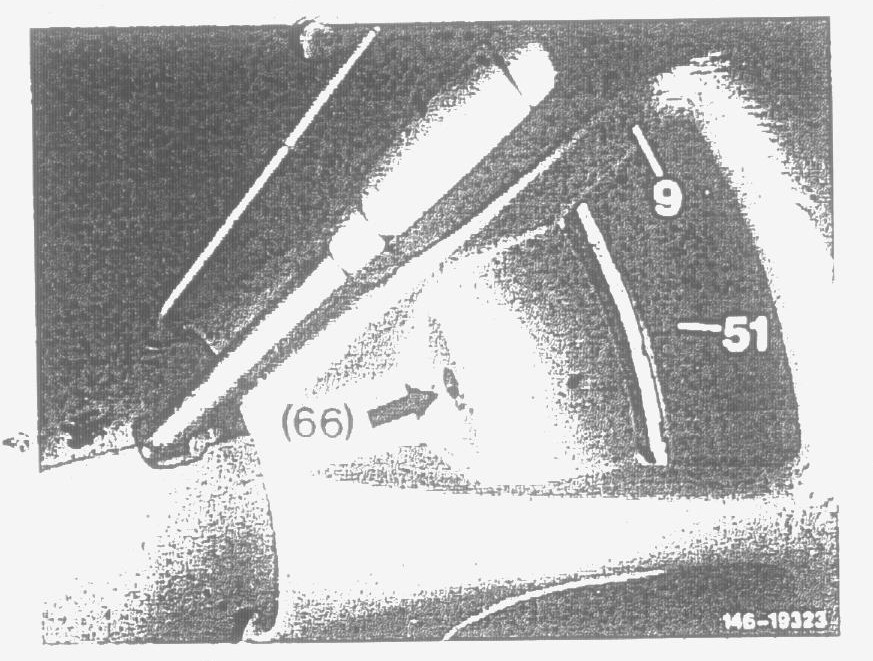
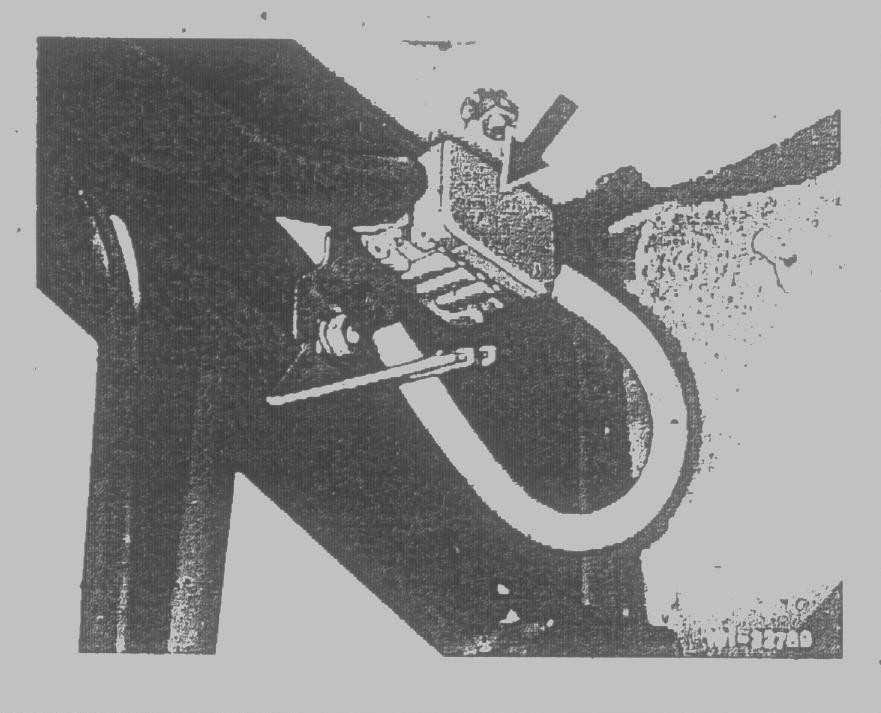
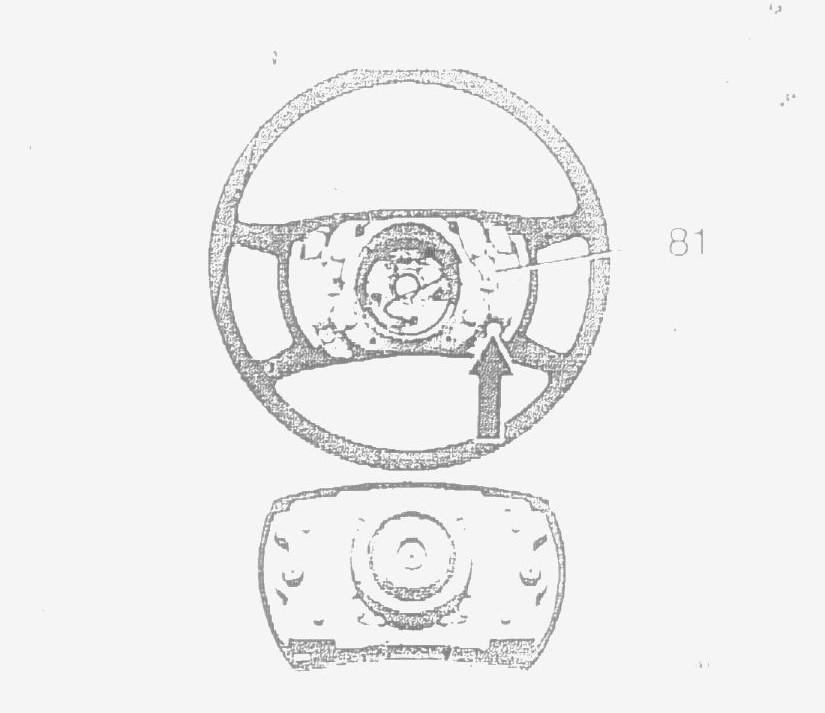
4. Unscrew both oval head screws (66) with intorx (refer to arrow) from generator carrier by means of screwdriver element this will release the generator carrier from contact.

5. Lift complete airbag unit (51) from steering wheel.

6. Pull connector (55) out of gas generator.
Note:
A short-circuit bridge in gas generator will become automatically effective when the connector is pulled off.
7. Remove airbag unit from steering wheel
Note:
a) Do not perform any additional jobs on entire airbag unit. The airbag unit must be stored under personal supervision or put away under lock and key if removed for an extended period
b) Only the complete air bag unit will be available as a spare part.
Attention!
Upon removal store airbag unit always with padded side facing upward.
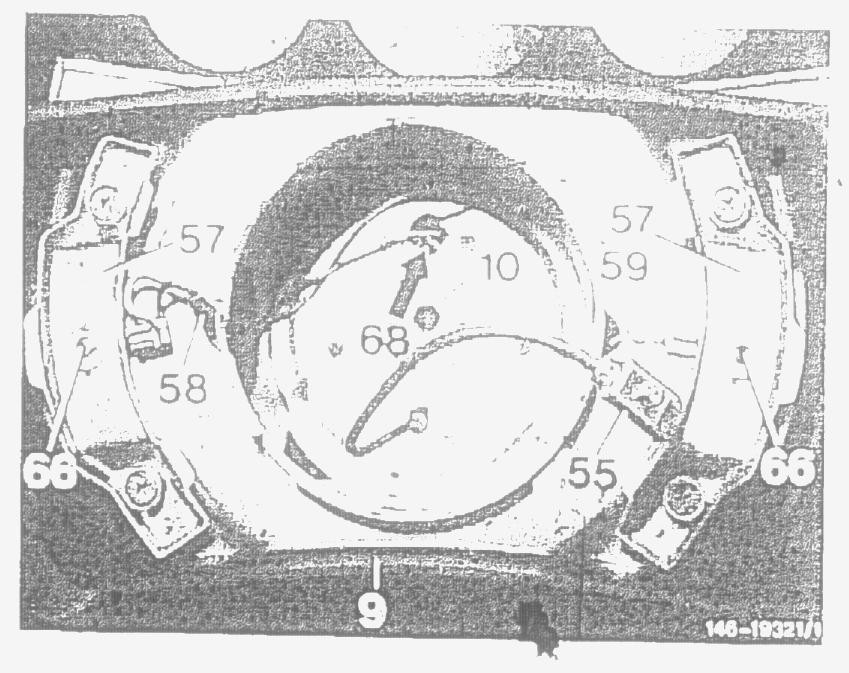
8. Unscrew countersunk screw (10) from steering shaft and remove steering wheel.
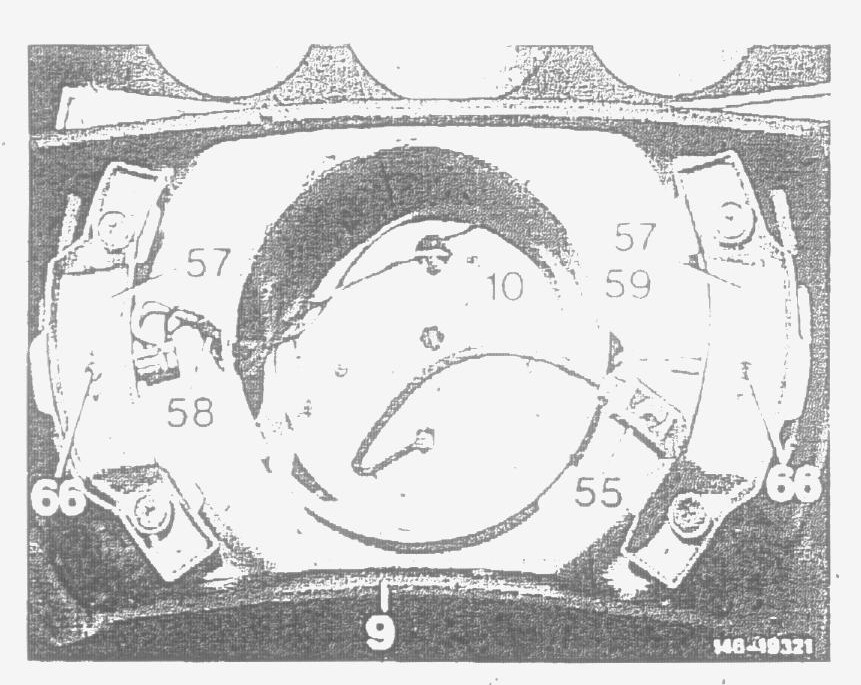
9 Steering wheel
10 Countersunk screw
55 Connector
57 Signal buttons
58 Signal horn cable
59 Grounding cable on steering wheel
66 Oval head screw with intorx
Installation:
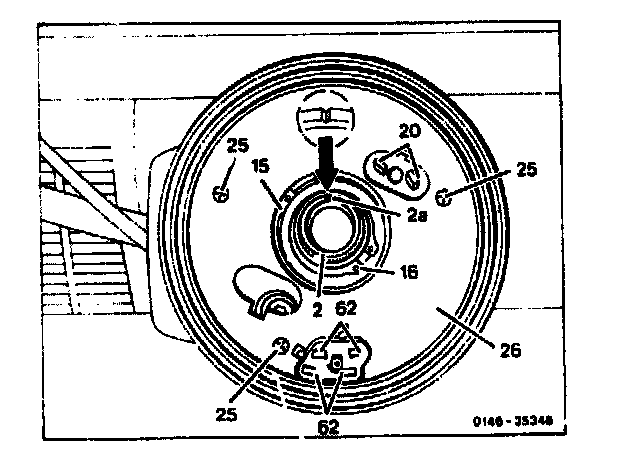
9. Turn steering shaft (2) in such a manner that the marking fine (2a) is pointing accurately in upward direction,
10. Check contact carbon brushes (20) for signal horn, as well as (62) for airbag unit.
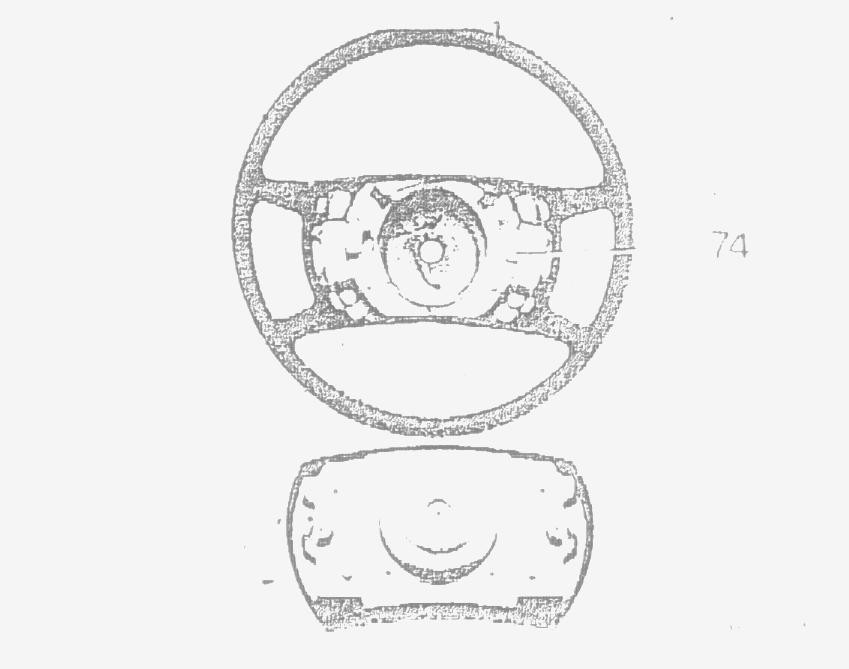
11. Place steering wheel on splining of steering shaft, while paying attention to horizontal position of spokes on steering wheel; the slightly curved spoke should be below.
12. Screw countersunk screw (10) into steering shaft and tighten to 80 Nm.
Note:
The self-locking countersunk screw must always be renewed.
13. During test drive, Check position of steering wheel in straightahead position of wheels. If the steering wheel position while driving straightahead does not agree with the front wheels, the steering wheel can be displaced in splining by max. 2 teeth to the left or right.
Note:
If the position of the steering wheel and the straightahead position of the wheels is than still not correct, check and adjust toe-in distribution starting from center position of steering.
Airbag Unit
Attention!
a) Do not use grease cleaning compounds or the like.
b) Also do not expose airbag unit to temperatures above 100°C, not even for short periods
c) The airbag unit is sensitive to impacts. If the unit drops on a hard base from a height of more than 50cm, the airbag unit should no longer be installed but must be returned to the Sindelfingen plant in a special package (for transportation).
d) Prior to installing airbag unit. check whether the grounding cable on battery is disconnected, the pole covered and the ignition key is in zero position.
14. Connect connector (55) to gas generator (connector must audibly engage).
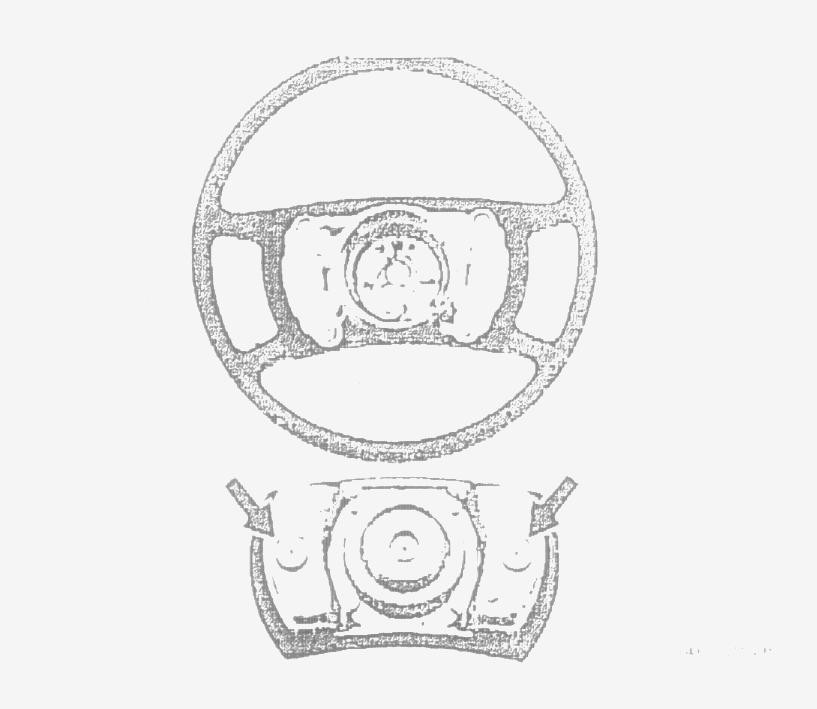
15. Place airbag unit (51) on steering wheel.
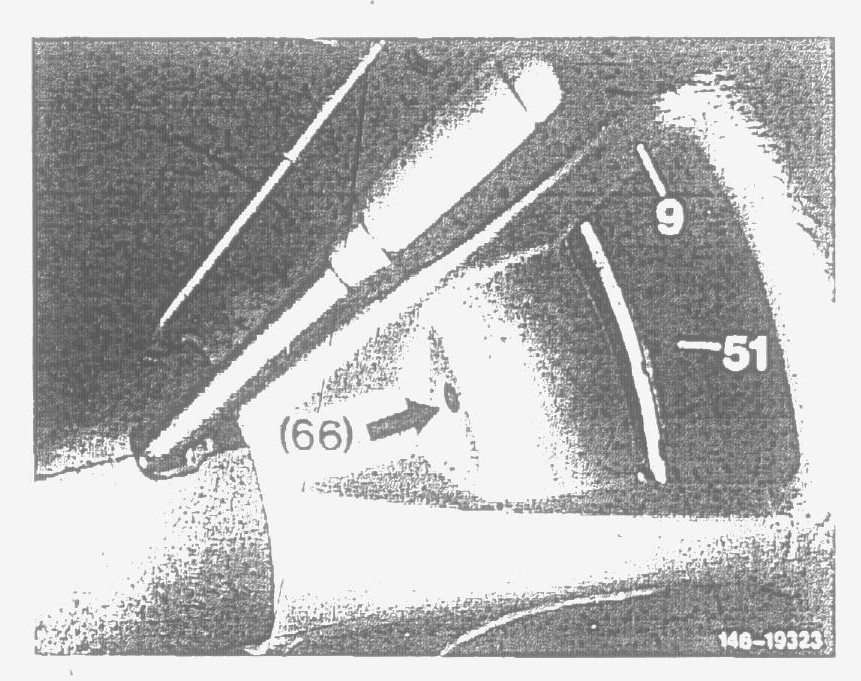
16. Screw oval head screw (66) with intorx (arrow) with insert into generator carrier. Tightening torque 6 Nm

9 Steering wheel
56 Generator carrier
57 Contact bridges
66 Oval head screw with intorx
67 Triangular spring
17. Apply light blows with hand against steering wheel rim to check for clattering noises. Noises are caused by tilting or diagonal play of airbag unit on steering wheel.
Remedy:
Steering wheel 1st version (installed up to 5/82)
18. Move airbag unit (pad) in diagonal direction under slight thumb pressure. while localizing the end play. Then remove airbag unit
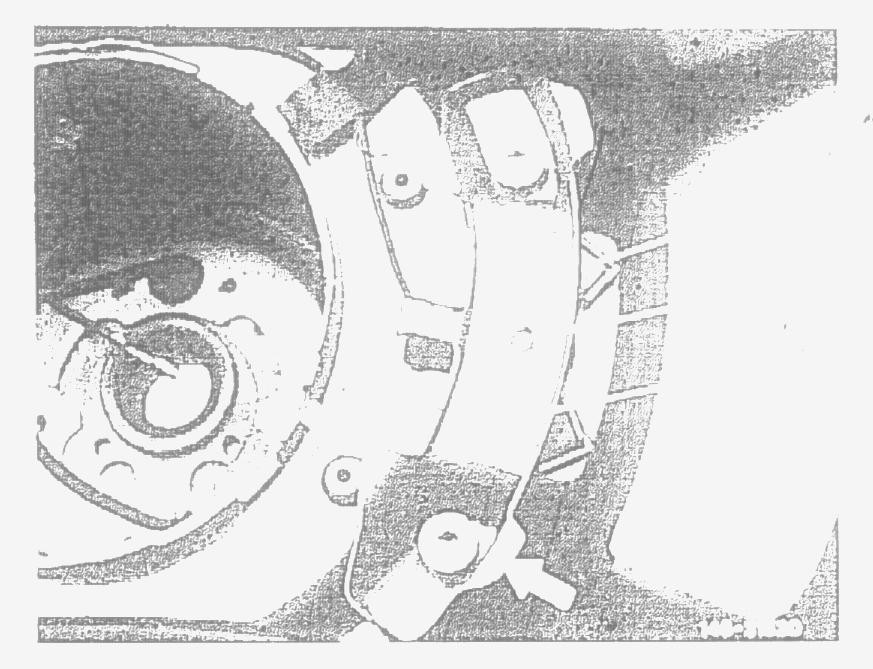
19. If axial play shows up. e.g. at top left on airbag unit, below on (lefthand contact bridge (57) (arrows) and e.g top right, below on righthand contact bridge carefully compress slightly each time in range of contact surface arrows).
Note:
If this will not eliminate axial play, the contact bridges must be renewed.
20. Check triangular springs if radial play shows up on an installed triangular spring, remove triangular springs and insulating plate and rebend support on grid impact absorber accordingly (arrows)
Steering wheel 2nd version (installed up to 11-85)
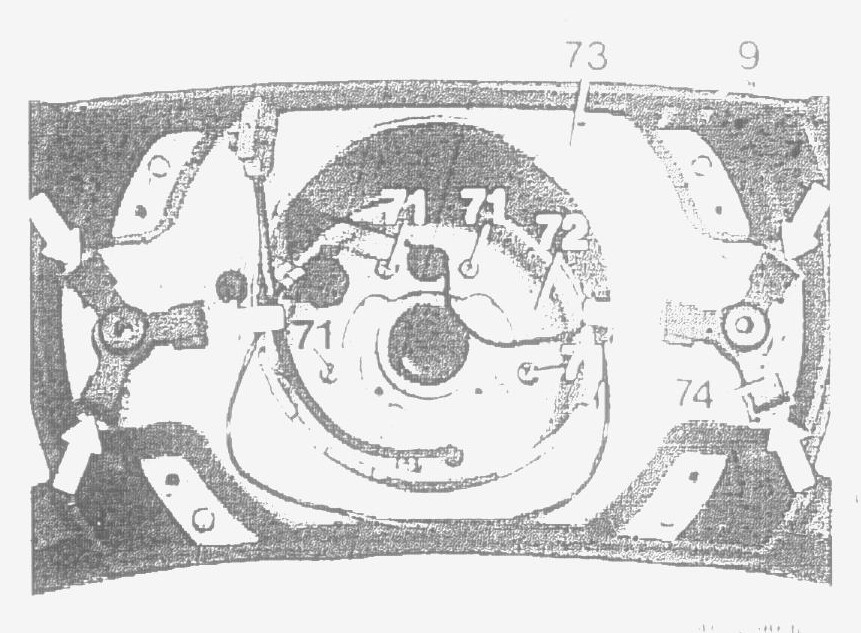
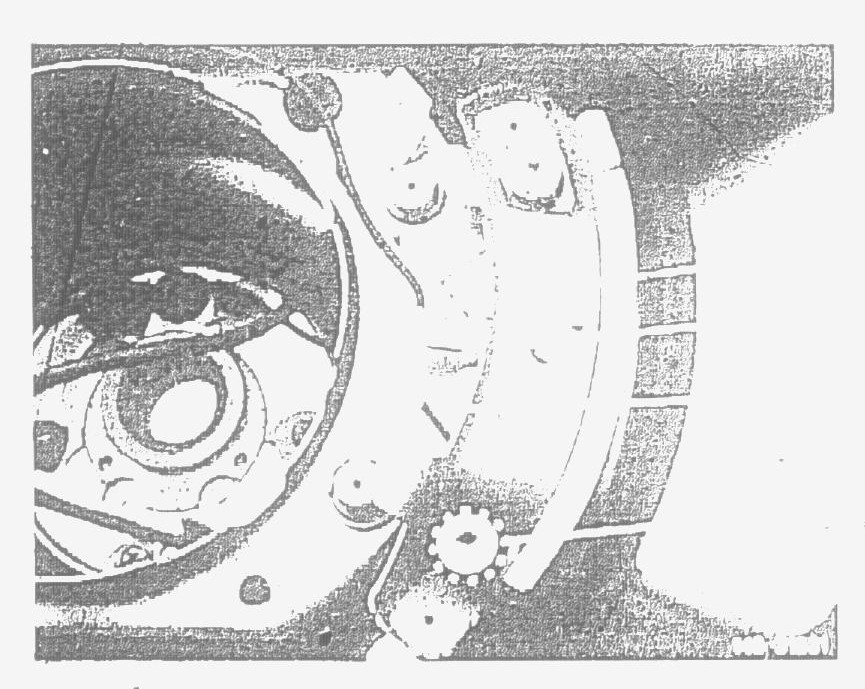
21. On this version, an adjusting wheel (80) is provided on righthand contact bridge (57) for eliminating axial play.
Example:
Play at bottom left or top right, turn adjusting wheel (8) with a suitable tool, e.g. small screwdriver, counterclockwise until the play is eliminated.

Attention!
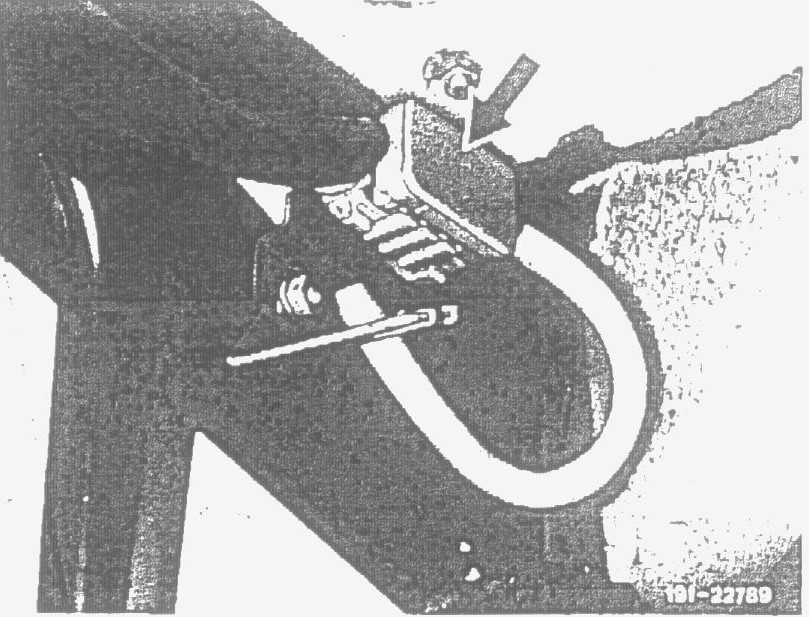
The airbag unit need not removed for this purpose. A cast-in duct is located in foaming of steering wheel in range of adjusting wheel for guiding the adjusting tool (refer to arrow).
Steering wheel 3rd version
22. Steering wheel in straightahead position. Loosen oval head screws with intorx and align airbag unit on steering wheel in such a manner that the unit is uniformly seated. Tighten lefthand intorx screw to specified tightening torque (6 Nm) first. Pull airbag unit at the right slightly from steering wheel and also tighten righthand intorx screw to specified tightening torque.
23. Check system with tester.
24. Upon testing. disconnect grounding cable on battery and connect connector to releasing device with the ignition switched off.
25. On 1st version, installed up to March 1987, install front cover under instrument panel.
1st version on parking brake console
26. On 2nd version, installed starting April 1987, place floor mat into front passenger's footwell.
2nd version an plate in front passenger's footwell
27. Connect grounding cable to battery.
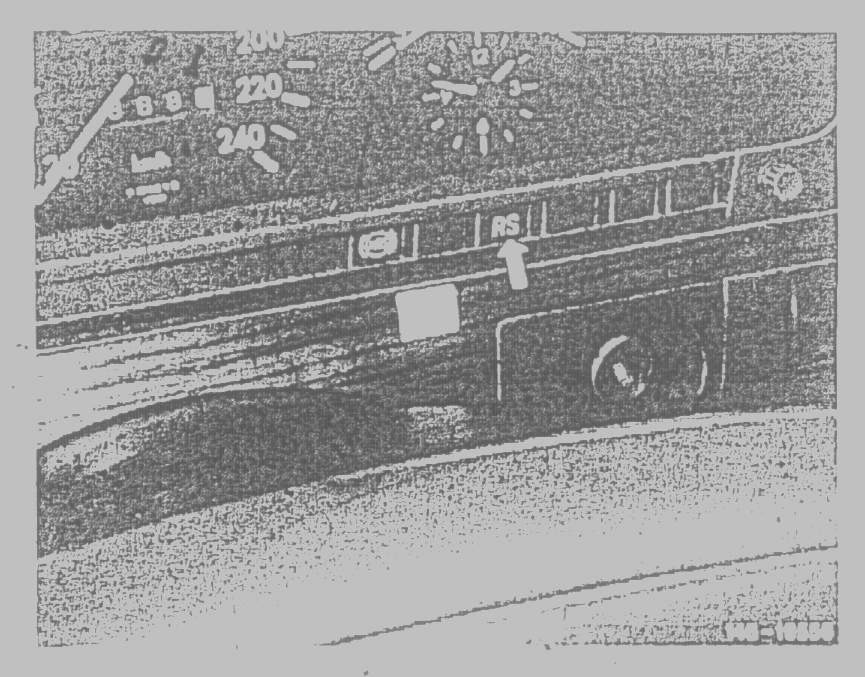
28. Observe indicator lamp during full steering lock in both directions with the engine running. The indicator lamp should then not light up or flicker
29. Check signal horns for function and automatic resetting of combination switch.
Note:
Dirty or sticky steering wheels can be cleaned with a neutral domestic detergent by washing the steering wheel with a luke-warm solution of the cleaning agent.
Do not use scrubbing agents, since they will attack the plastic foaming.