Front Seat Belt with Tensioner (ETR), Removal and Installation
Removing and Installing Seat Belt with Belt Tensioner:
NOTE: Noise in the belt retractor when the seat belt is retracted is due to its method of operation. In the event of complaints, unreasonable noise can only be rectified by renewing the seat belt. Under no circumstances must oil or grease be used to eliminate noise.
Similarly, the belt retractor must not be dismantled, as the pretensioned spring may lead to accidents. Belt retractors which have been opened are no longer covered by warranty.
Tester:

Testing (vehicles up to 09/87):
After working on the airbag/belt tensioner restraint system, the resistance of the belt tensioner detonators must be measured using the airbag tester, Testing and Inspection In vehicles with belt tensioner (standard equipment, without airbag), the resistance of the belt tensioner detonator should be measured in accordance with the testing procedures for the tensioner, Testing and Inspection
Testing (vehicles as of 09/87):
After working on the airbag/belt tensioner restraint system, the resistance of the belt tensioner detonators must be measured and the system tested by means of the pulse display, Testing and Inspection In vehicles with belt tensioner (standard equipment, without airbag), the resistance of the belt tensioner detonator should be measured in accordance with the testing procedures for the tensioner, Testing and Inspection
A. Model 107:
Removal and Installation:
Conditions:
Hard top removed or roadster top folded back. Side panelling in rear compartment removed.
- Turn ignition key to position "0".
- Disconnect and cover battery negative terminal.
- Vehicles with airbag: Disconnect red 10-pin plug connection in passenger's footwell. Air Bag Safety Switch/Connector
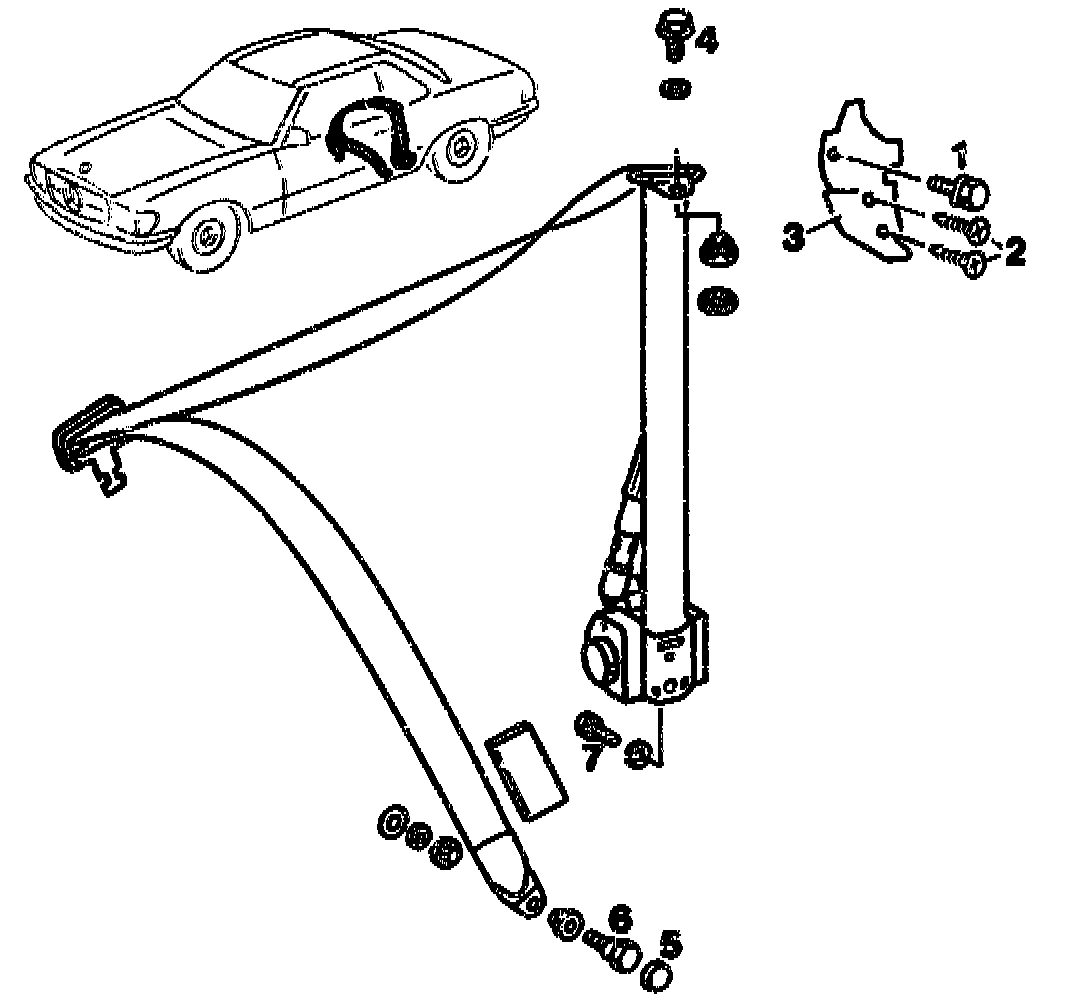
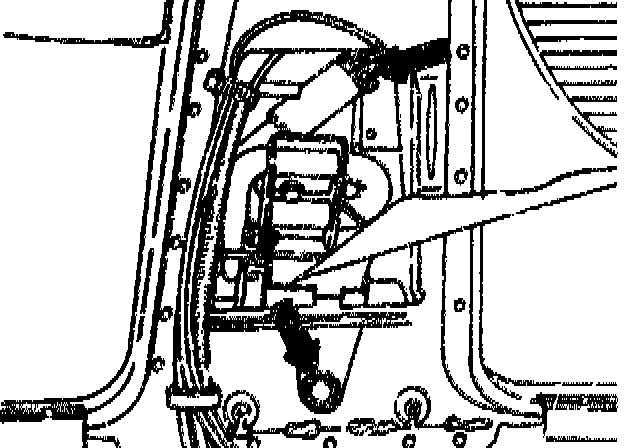
- Unscrew bolts (1 & 2).
- Remove cover (3).
- Unscrew bolt (4) on sash guide. Tighten to 35 Nm on re-installation.
- Press off cover on seat frame.
- Unscrew bolt (6). Tighten to 35 Nm on re-installation.
- Disconnect plug connector of belt tensioner detonator.
- Unscrew bolt (7) on belt retractor. Tighten to 35 Nm on re-installation.
- Remove belt tensioner.
Installation is the reverse of the removal procedure.
Installation Note: When installing the belt tensioner(s), note that there are different versions (for left and right) and ensure that it locates correctly in the catch.
B. Model 123
Removal:
1. Turn ignition key to position "0". Disconnect and cover battery negative terminal.
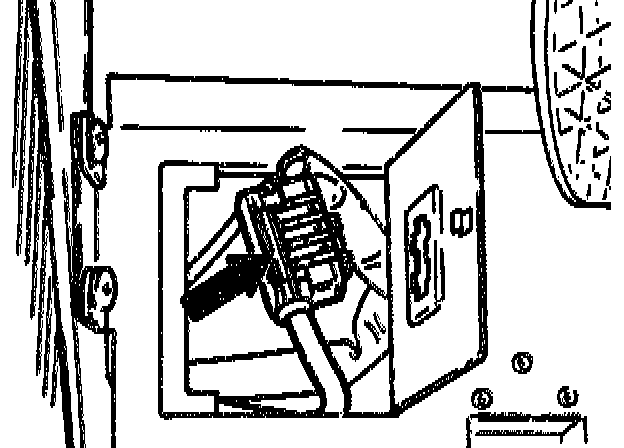
2. Remove floor mat in left-hand front footwell.
3. Open flap in foot rest and pull off red 10-pin plug connection of triggering unit on the back.
4. Remove covering on right-hand center pillar.
5. Unscrew bolt on sash guide.
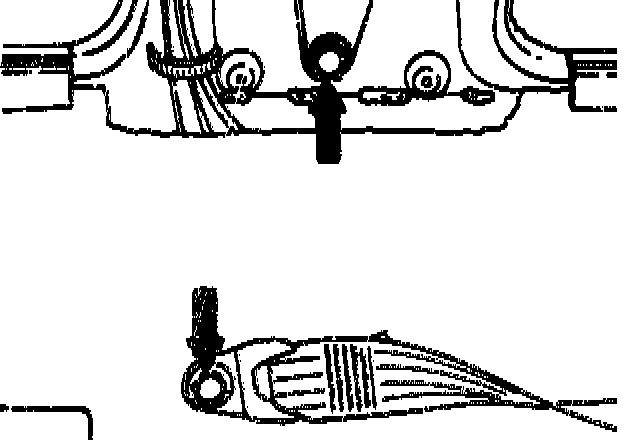
6. Unscrew mounting bolt on side member and on belt tensioner.
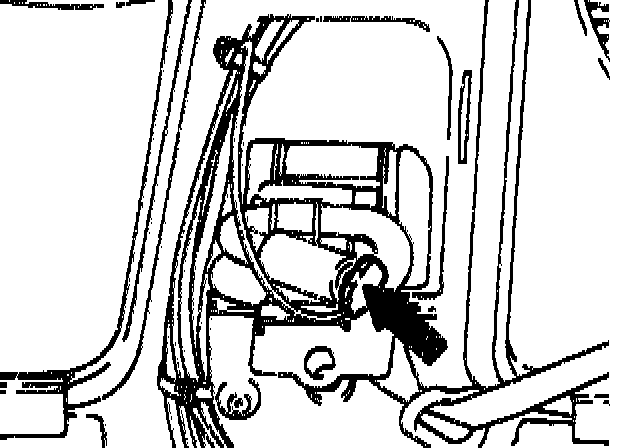
7. Remove belt tensioner from center pillar and pull off plug connection.
WARNING: Do not hold belt tensioner unit at turbine wheel. If the propellant is accidentally ignited the turbine wheel is rapidly accelerated (risk of injury).
Installing:
Installation Note: When installing the belt tensioner(s), note that there are different versions (for left and right) and ensure that it locates correctly in locking device.
8. Connect belt tensioner by means of the plug connection (plug connection mus engage audibly).
9. Install belt tensioner. Tightening torque of mounting screw is 35 Nm.
10. Test system with tester.
11. Continue installation in reverse sequence.
12. Check system with RS warning lamp.