Removal and Installation of Spring Plate
a) Spring plate
Removal
1 If the refrigerant compressor is removed, clamp refrigerant compressor with refrigerant compressor carrier into vise, without refrigerant compressor carrier into holding fixture for refrigerant compressor.
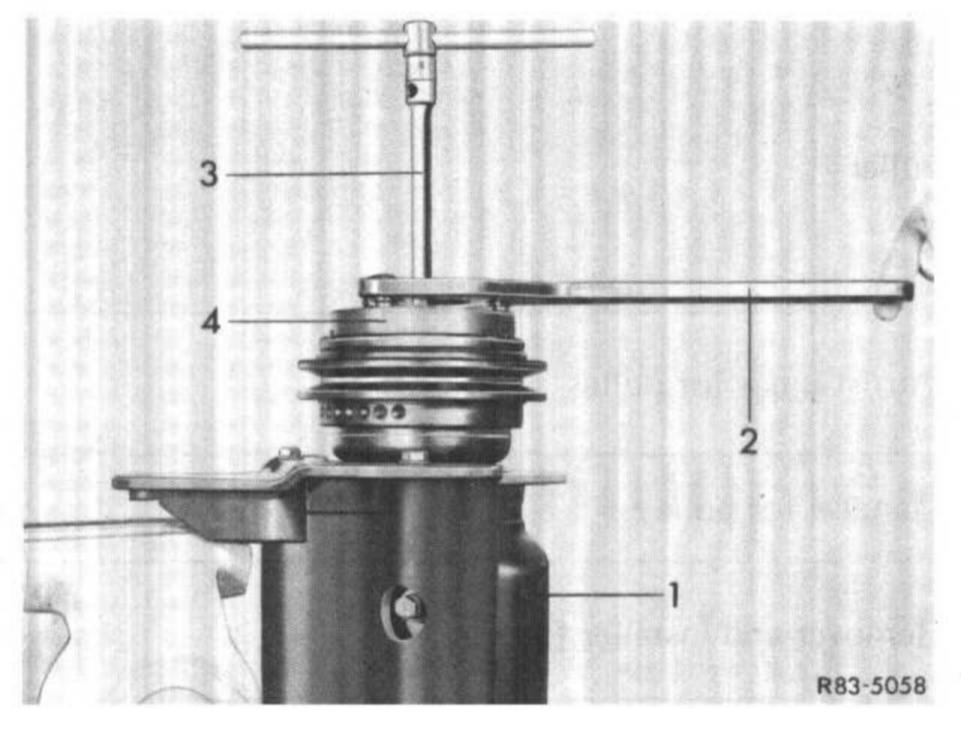
2 Prevent rotation of spring plate (4) by means of holding tool (2), unscrew collar nut from shaft using 14 mm socket.
1 Refrigerant compressor
2 Holding tool
3 Socket
4 Spring plate
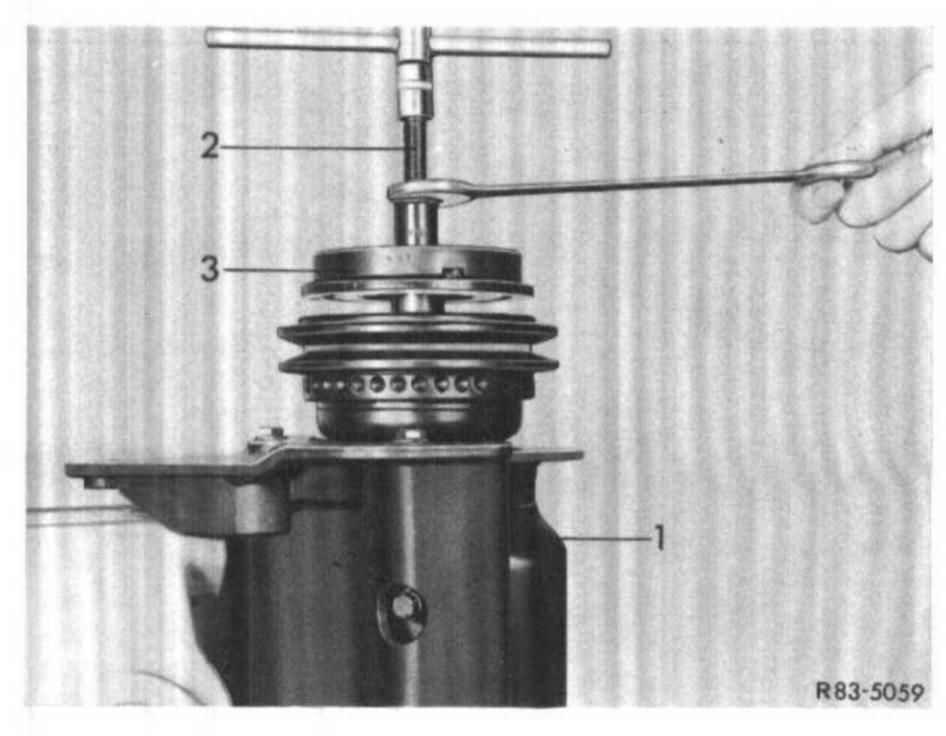
3 Screw remover (2) into hub. Hold tool in place with wrench and tighten central screw.
1 Refrigerant compressor
2 Remover
3 Spring plate
4 Remove Woodruff key from shaft.
Installation
5 Insert Woodruff key into shaft.
6 Clean friction surface of spring plate and pulley.
7 Place spring plate on shaft so that key and key groove are in alignment.
Attention! To protect parts inside compressor against damage, do not knock on or against spring plate or shaft.

8 Place spacer (2) on spring plate (1). Insert installer (3) through spacer (2) and screw installer (3) to shaft end.
9 Hold hexagon of tool in position and screw-in center screw by several turns to press spring plate in part on shaft.
10 Remove installer (3) and spacer (2), check key and key groove for alignment. If both are correctly aligned, mount installer again and continue pressing spring plate (1) on shaft until a distance of approx. 1 mm to 1.5 mm is obtained between the friction surfaces of the pulley and the spring plate.
11 Remove installer (3) and spacer (2).
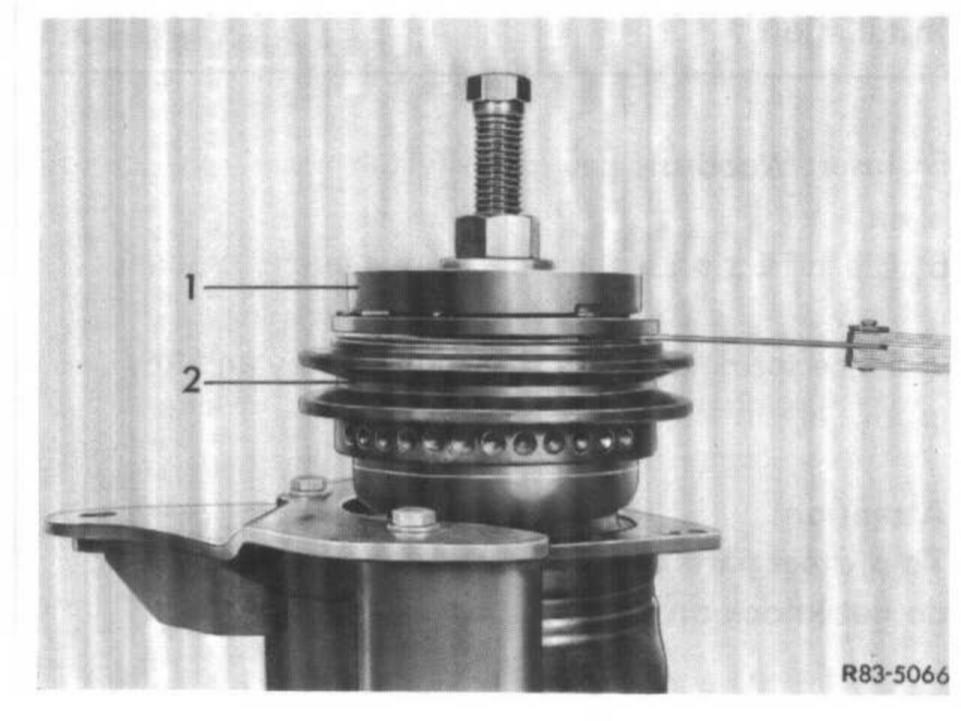
12 Screw on new collar nut. Hold spring plate in place with holding tool (2) and tighten counternut. Distance between the two friction surfaces of the pulley and the spring plate should now amount to approx. 0.5 to 1.5 mm.
1 Spring plate
2 Pulley